Best Camping Coffee Makers of 2024
Portable Coffee Makers for Camping, Backpacking, and Outdoor Use

Updated on May 24th, 2024 to reflect new models we tested by Stanley and a new best french press.
There’s no reason you should have to venture into the backcountry without a good cup of coffee when you roll out of your tent in the morning. We can help you find the best camp coffee maker for everything from single-serving espresso to a camping coffee pot big enough for the whole crew.
Our coffee nerd writers and testers brewed coffee with 14 different systems in the backcountry to find the best camp coffee makers for every kind of outdoor adventure. We also cover coffee brewing basics and how to get the best coffee extraction, as well as what to do with coffee grounds while camping or backpacking.
Think you’d prefer something faster? Check out our guide to Best Instant Coffee.
We create reader-supported, objective gear reviews independently selected by our editors. This story may contain affiliate links, which help fund our website. When you click on the links to purchase gear, we may get a commission, without costing you an extra cent. Thank you for supporting our work and mission of outdoor coverage for every body! Learn more.
Camping Coffee Maker Summary Table
| COFFEEMAKER | TREELINE AWARD | BREW TYPE | SERVING SIZE | WEIGHT | PACKABILITY | FILTER TYPE |
|---|---|---|---|---|---|---|
| Aeropress | Best Overall Read why |
vacuum press/column | 1 cup | 16.5 oz | water bottle size | paper |
| Aeropress Go | Best for Travel Read why |
vacuum press/column | 1 cup | 11.5 oz | stows in mug | paper |
| Hario V60 plastic pour over | Best Budget Read why |
pour over | 1-4 cups | 3 oz | cone-shape | paper |
| MSR Mugmate | Best for Backpacking Read why |
steep | 1 cup | 11 oz | stows in mug; does not collapse | mesh |
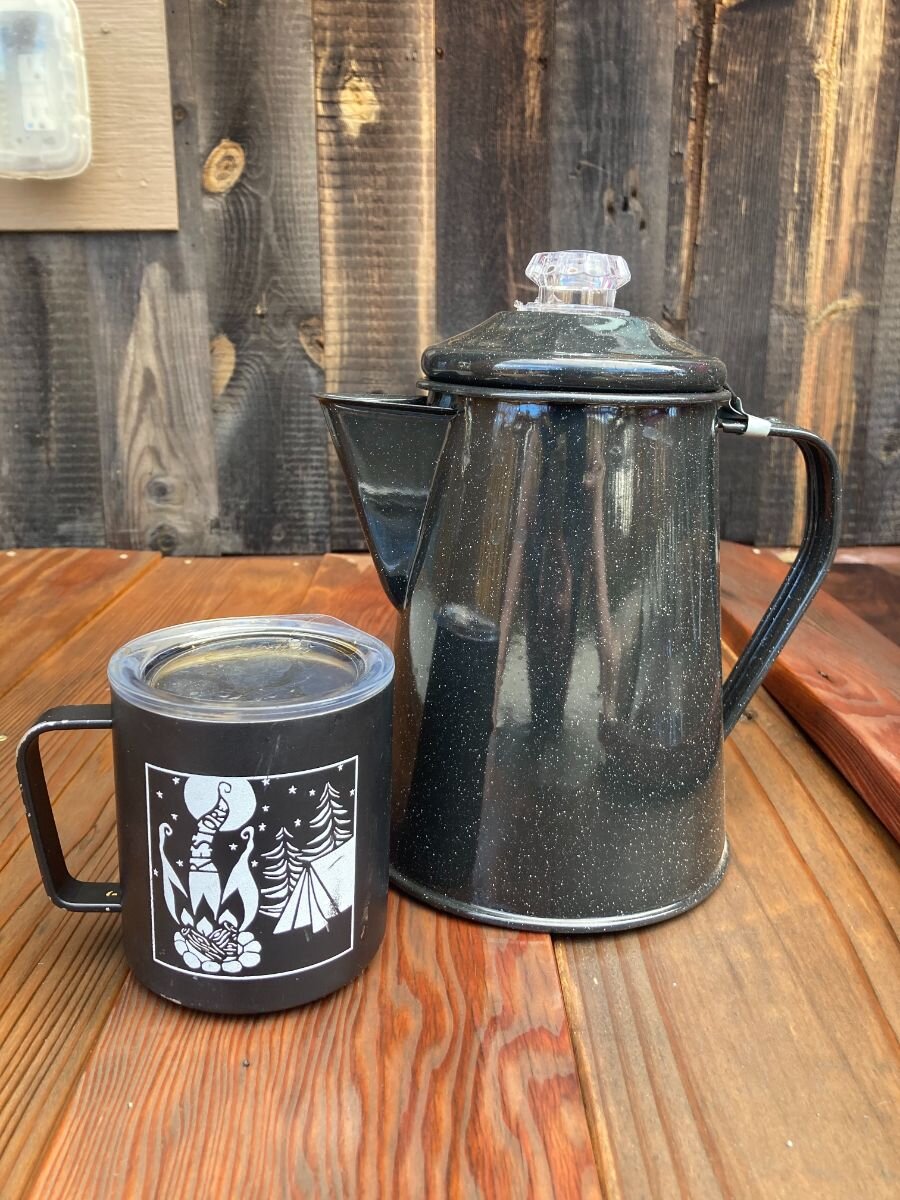
| GSI Enamelware Percolator | Best for Groups Read why |
percolator | 12 cups | 21 oz | large | none |
The 5 best camp coffee makers
The Best Camp Coffeemaker:
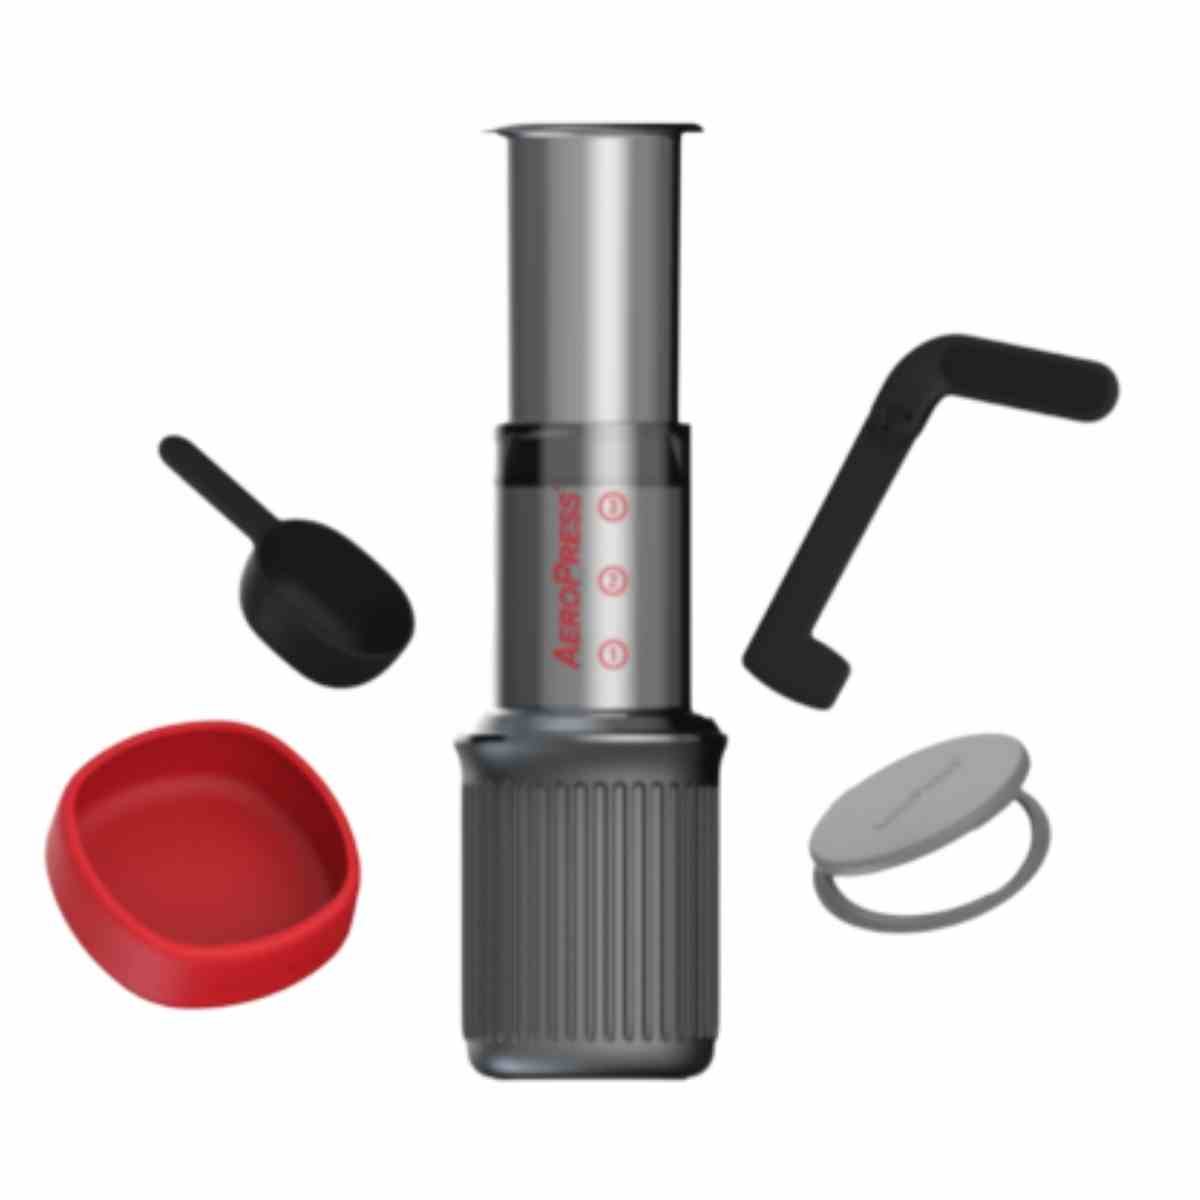
Aeropress
Brew Type: Vacuum press/column
Weight: 11.5 oz
Serving Size: 1 cup (10 oz)
Filter Type: Paper
What we liked: Excellent flavor, consistency, light, packable, durable
What we didn't like: Some backpackers may consider it heavy, proprietary filters
Excellent tasting coffee that’s consistently good with every brew: That’s the AeroPress in a nutshell. But add to that the fact that this home kitchen favorite is light and packable enough to stash in your backpack or camper and durable enough for any outdoor adventure, and you’ve got a recipe for the ideal camp coffee maker. The AeroPress and the best travel coffee maker the AeroPress Go inched out the Hario V60 Pour Over for our “Best Overall” award thanks to its versatility and consistently good coffee, no matter the skill level of the person brewing it.
Compare prices of the Aeropress
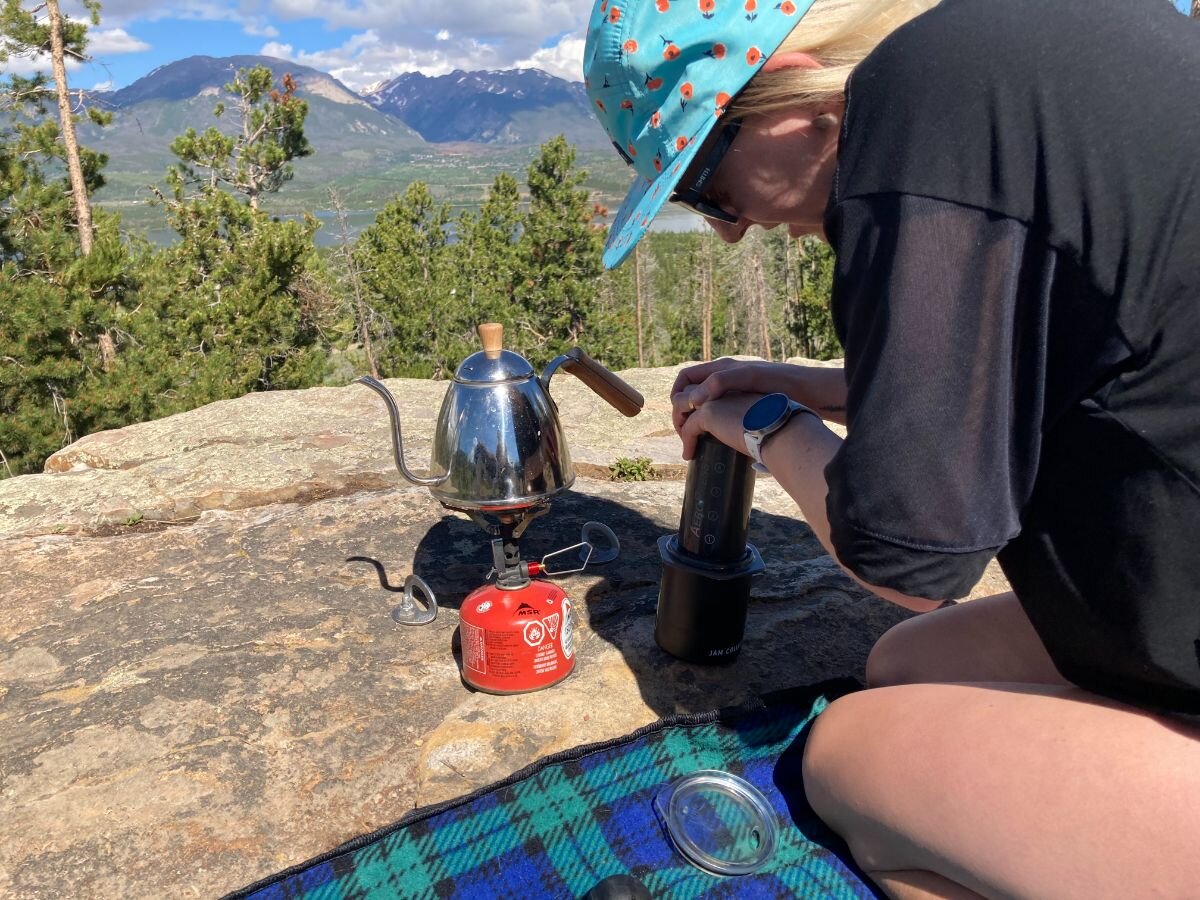
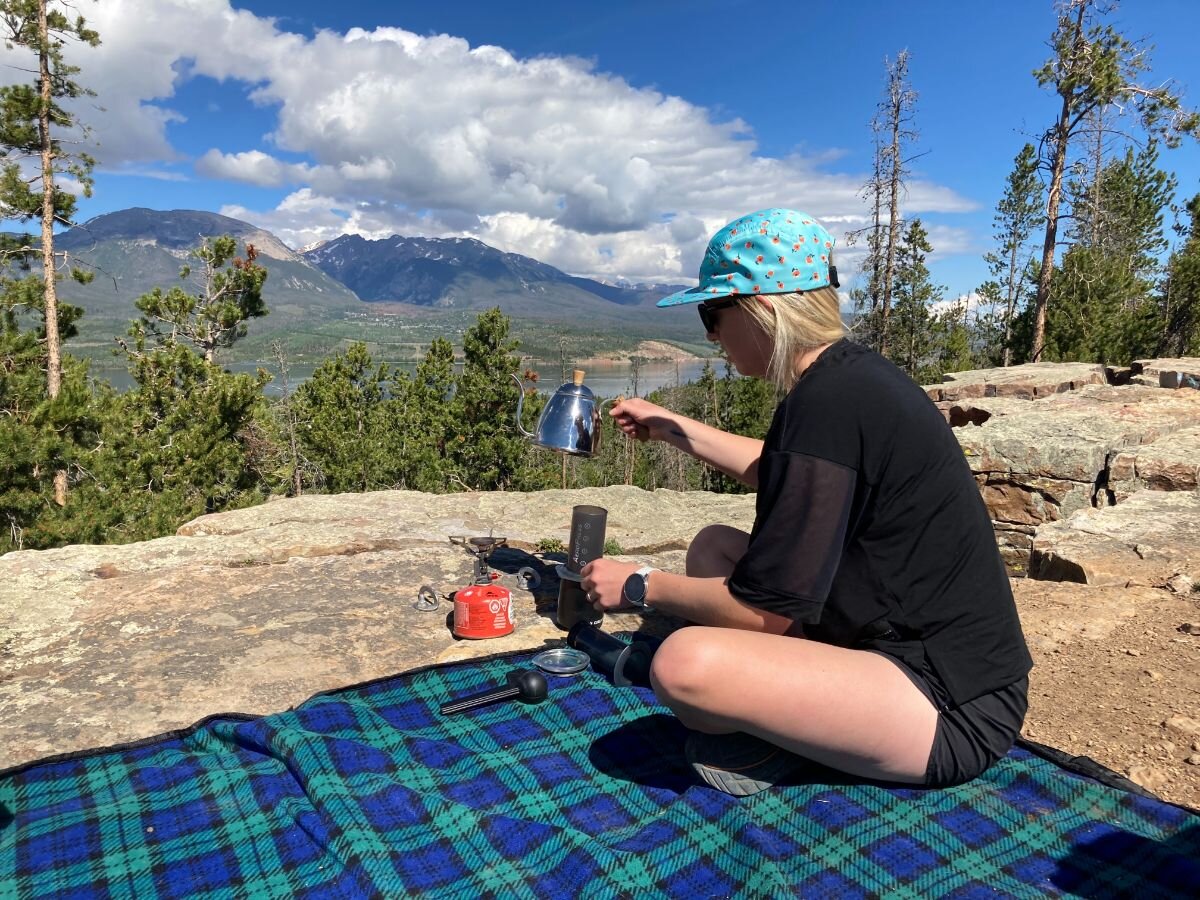
The AeroPress uses a plunger-like device to push hot water through coffee grounds, a process referred to as forced extraction. Here, the author is pushing coffee through grounds on the AeroPress. Photo courtesy Stasia Stockwell.
The classic AeroPress is designed with a plunger-like device that pushes hot water through the coffee grounds, a process referred to as forced extraction in the coffee world.
The AeroPress uses a small paper filter, which helps give the finished brew a clean and smooth taste and keeps sludge from forming at the bottom of your cup. It comes with some and you can purchase replacements or a reusable stainless steel filter.
Another bonus of the AeroPress is that it’s easy to control the strength of your coffee. Want a strong, espresso-like brew? Can do. If you prefer a regular cup of American-style coffee, just add some hot water.
The AeroPress can even make cold brew for hot summer days at camp. Our taste-testers loved AeroPress coffee’s smooth and robust flavor and favored it in the top two of all the brew methods tried. (The Hario V60 received an equal amount of praise for flavor.)
Unlike pour over systems that require a goose-neck-style kettle for optimal extraction, with this system, pouring precision isn’t vital (primarily because this method uses forced extraction rather than percolation).
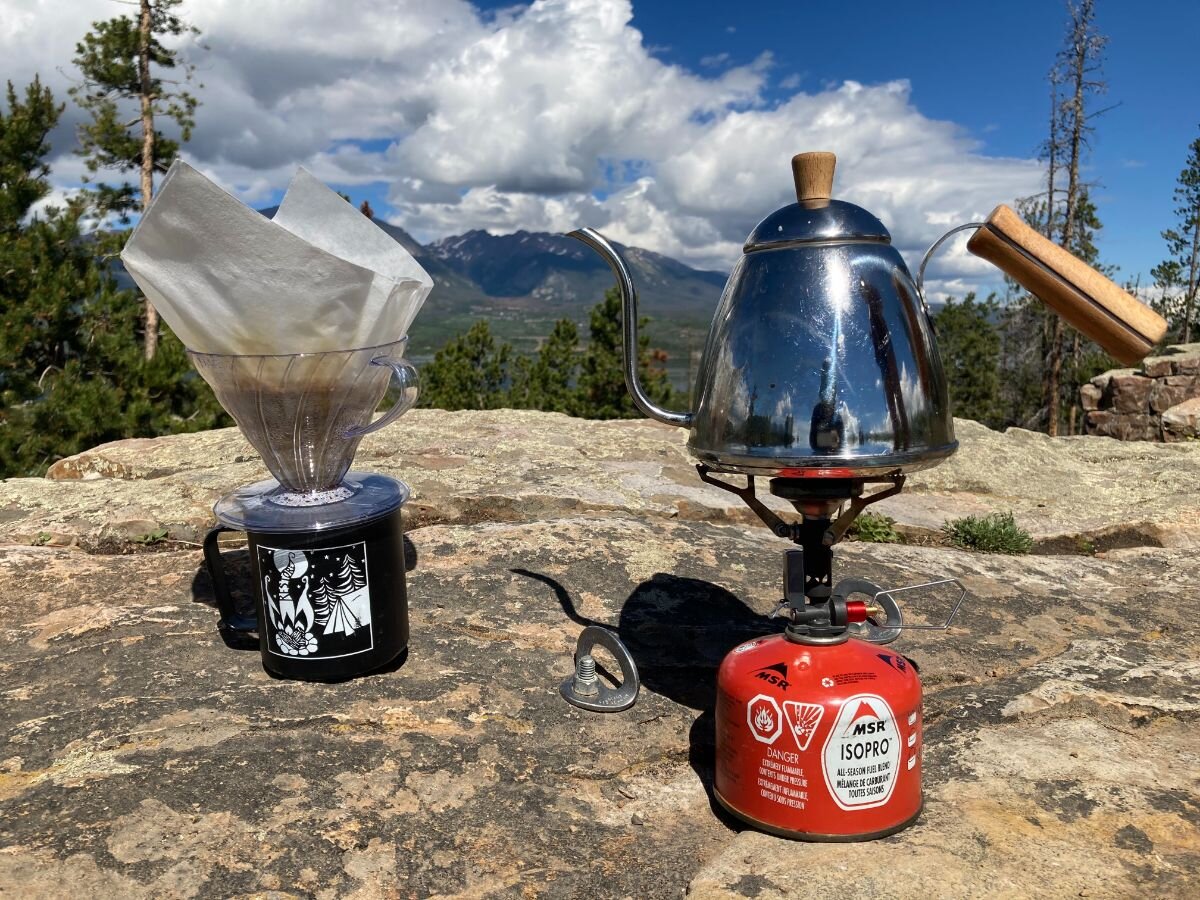
Pouring hot water from a basic camp kettle or even a cook pot with a spout like the MSR Titan Kettle works just as well as a proper coffee kettle.
Brewing a cup of coffee with the AeroPress takes only about one minute, and cleanup is easy: Remove the cap, push out the coffee grounds and filter into the trash in one swoop.
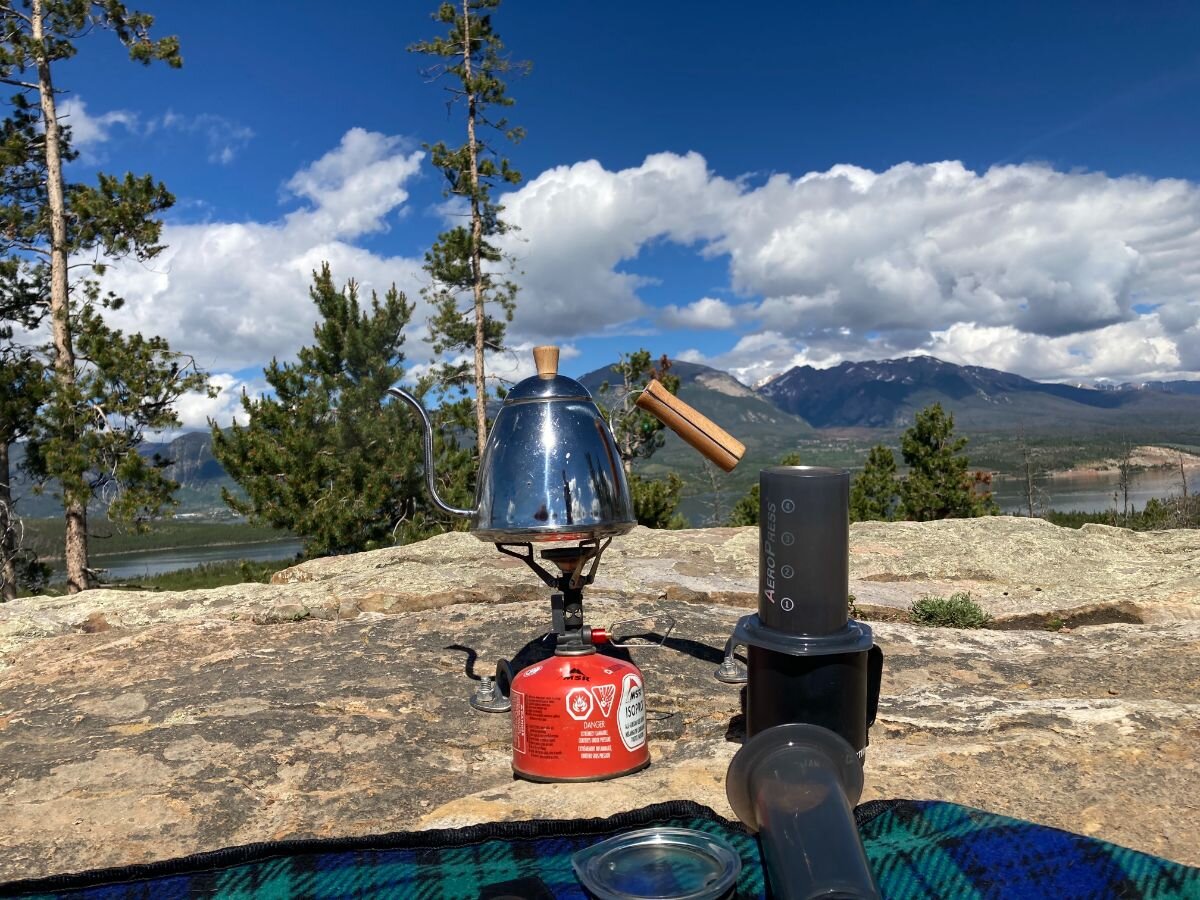
A gooseneck kettle can help with precision pouring into camp coffeemakers, especially ones like the Hario V60 that require technique to evenly extract the grounds. One benefit of the AeroPress is that it evenly extracts even if you don’t have a gooseneck kettle. Photo courtesy Stasia Stockwell.
While you do have to dispose of a paper filter with this brew, it’s incredibly small (in fact, it’s the smallest of any camping coffee system that uses a paper filter). That means it won't add much weight or bulk at all to the trash you pack out.
Bonus: Extra water for rinsing the brewer clean isn’t necessary since the grounds come out in one solid puck. We rinse the plunger when using it at home, but not in the backcountry when we’re conserving water.
The original AeroPress can brew up to four servings of espresso-strength coffee or a few small cups of regular coffee. The Go, being smaller, can make up to three servings of espresso and two small cups of regular coffee. Because of this, the AeroPress is ideal for individuals or a few people but may be tedious to use for big groups when a large coffee percolator (like the GSI Enamelware Percolator) or french press requires less work.
The classic AeroPress weighs 16.5 oz. and packs to the size of a small travel mug. The Go is smaller and lighter at 11.5 oz, making it even more packable. The AeroPress is plenty small for car camping trips and reasonably packable enough to take backpacking if weight isn’t a concern. The AeroPress Go is even better-suited as a portable travel coffee press. Neither system is the lightest or most packable in our test, but the ease of use, durability, versatility, and quality of coffee more than make up for that.
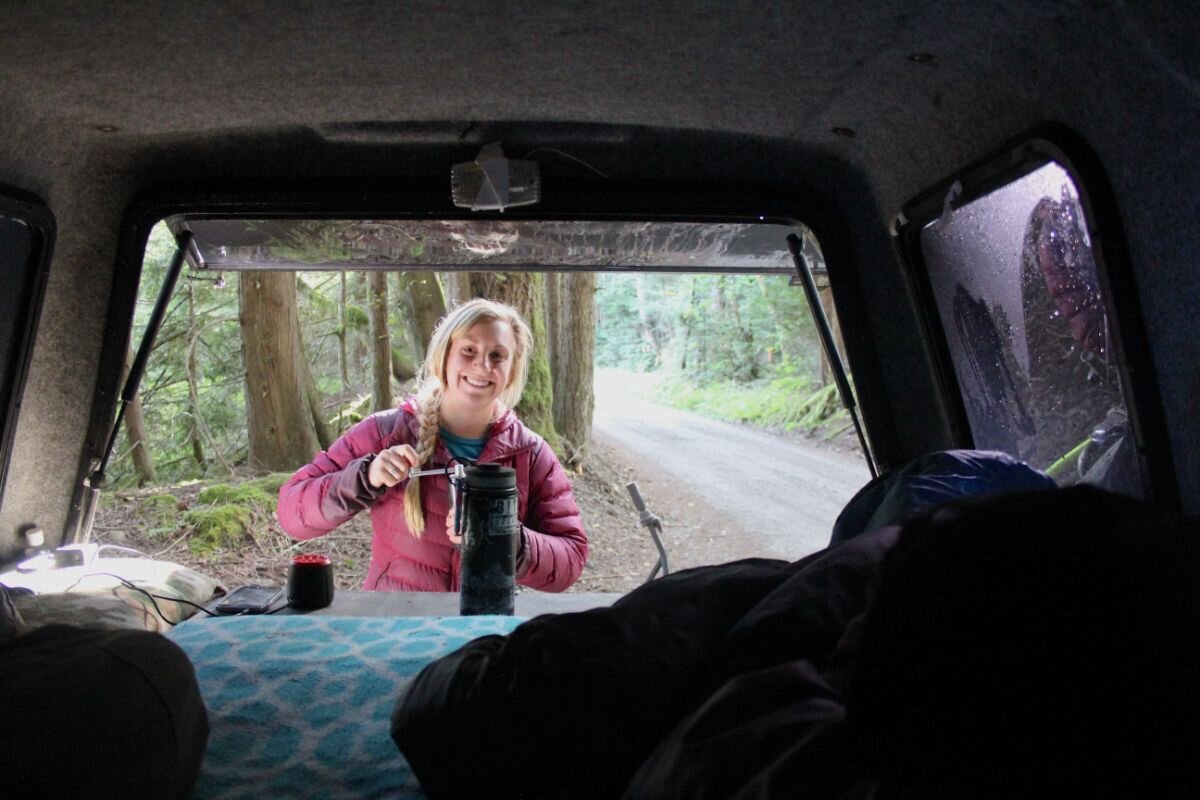
Made chiefly of tough plastic without any dainty parts to the system, the AeroPress and AeroPress Go don’t have durability issues. We used the AeroPress on adventures across the west, from winter ski trips in a camper van to summer camping and backpacking in the Rockies (our testers don’t mind sacrificing some ounces in their packs for great coffee).
The AeroPress can handle most anything a backcountry adventure could throw at it. From being jostled around in packs and camping bins to near-daily use for months at a time while traveling in a van, it functions good-as-new and hardly shows signs of wear.
The AeroPress original comes with a tote bag, 350 microfilters. The Aero Press Go packs into its own included camp mug and also includes 350 microfilters and a travel filter holder that fits 20 filters.
The AeroPress offers the best-tasting camp coffee that provides both versatility and consistency with every brew. Moreover, it’s all in a reasonably compact, travel-friendly, and highly durable package. That’s why the AeroPress and its smaller sibling, the AeroPress Go, are hands-down our favorite camp coffee makers.
Best Travel Coffeemaker:
AeroPress Go

Brew Type: Vacuum press/column
Weight: 11.5 oz
Serving Size: 1 cup (8 oz)
Filter Type: Paper
What we liked: Excellent flavor, consistency, light, packable, durable
What we didn't like: Proprietary filters
If you're traveling or backpacking and need a smaller coffeemaker, the AeroPress Go wins our award for best travel coffee maker.
The AeroPress Go uses the same classic design as our overall winner in a smaller package that weighs 5 oz less and makes only a slightly smaller cup of coffee (8 oz vs. 10 oz).
Compare prices of the Aeropress Go
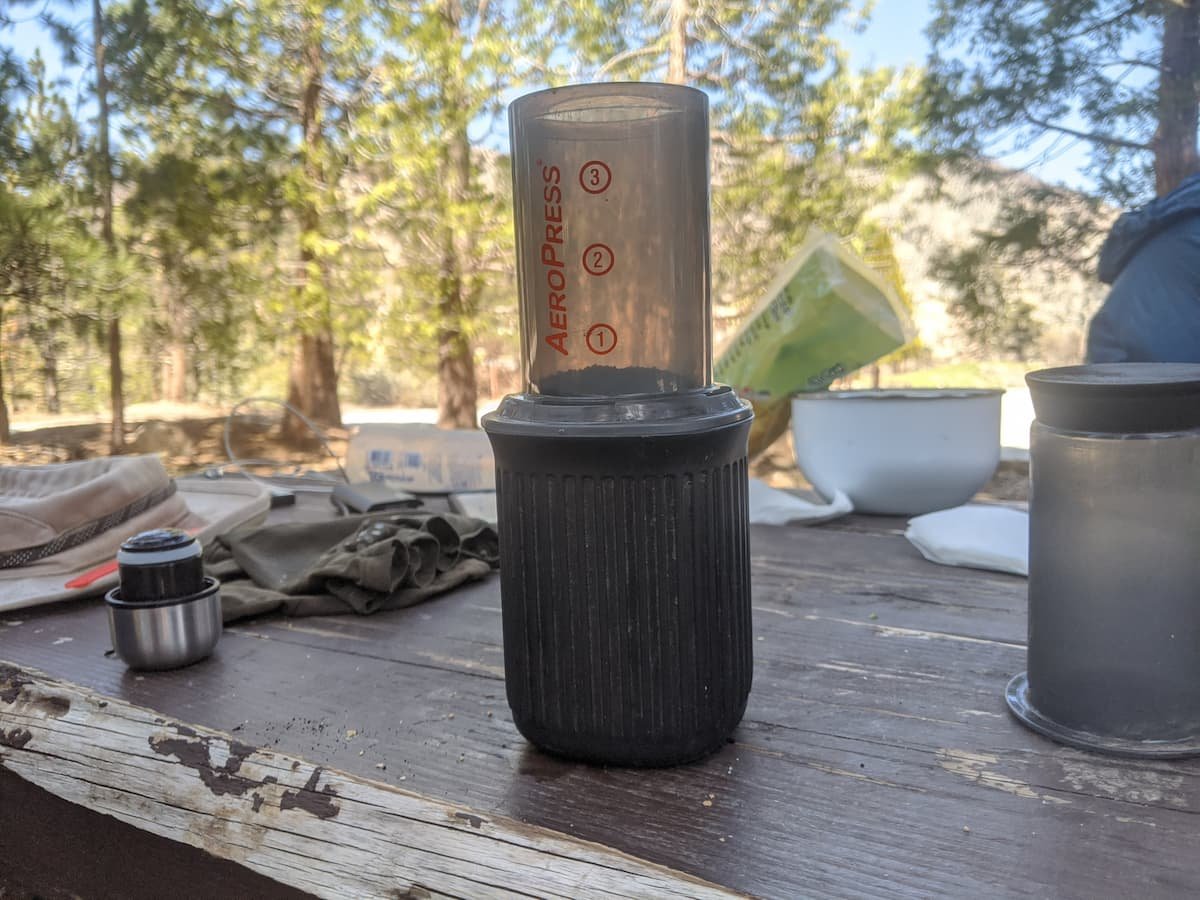
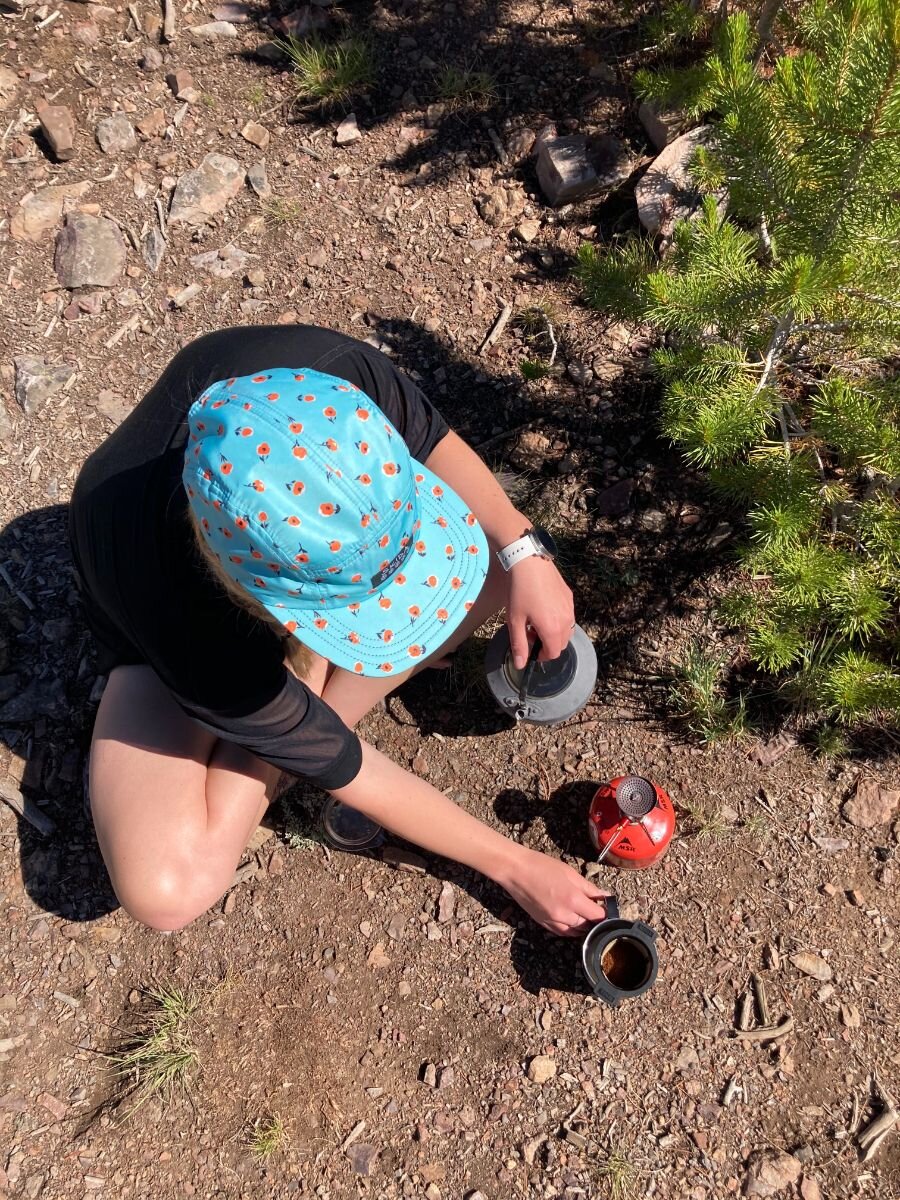
A PCT thru-hiker tested this Aeropress Go and still loved carrying it after 500 miles. It makes one cup and weighs less than the regular size Aeropress.
The AeroPress Go uses the same plunger-like device as the AeroPress to push hot water through the coffee grounds, a process referred to as forced extraction in the coffee world. The primary difference between the original and the Go is that it’s more compact and designed specifically for travel; the way they brew coffee is identical.
The AeroPress Go uses the same small paper filter as the AeroPress, which helps give the finished brew a clean and smooth taste and keeps sludge from forming at the bottom of your cup.
As with the AeroPress, the AeroPress Go doesn't need a gooseneck bottle to get the perfect brew. This is primarily because this method uses forced extraction rather than percolation. This means you won't have to carry along a heavy or bulky kettle on your travels but instead can use a regular backpacking cookpot or even a hotel hot water kettle.
Best Budget Camp Coffee Maker:
Hario V60 Pour Over

Brew Type: Pour Over
Weight: 3 oz
Serving Size: 1 -4 cups
Filter Type: Paper
What we liked: Price, ease of use, size availability, evenly extracted, clean and bright cup
What we didn't like: Learning curve to build technique for a better tasting cup
A perfectly hand-brewed pour over is a coffee lover’s dream. Take that cup of coffee into the backcountry, and you’re set for a great morning. Then, to add a cherry on top, make the brewing device for that perfect cup of coffee incredibly affordable. Now we’re talking.
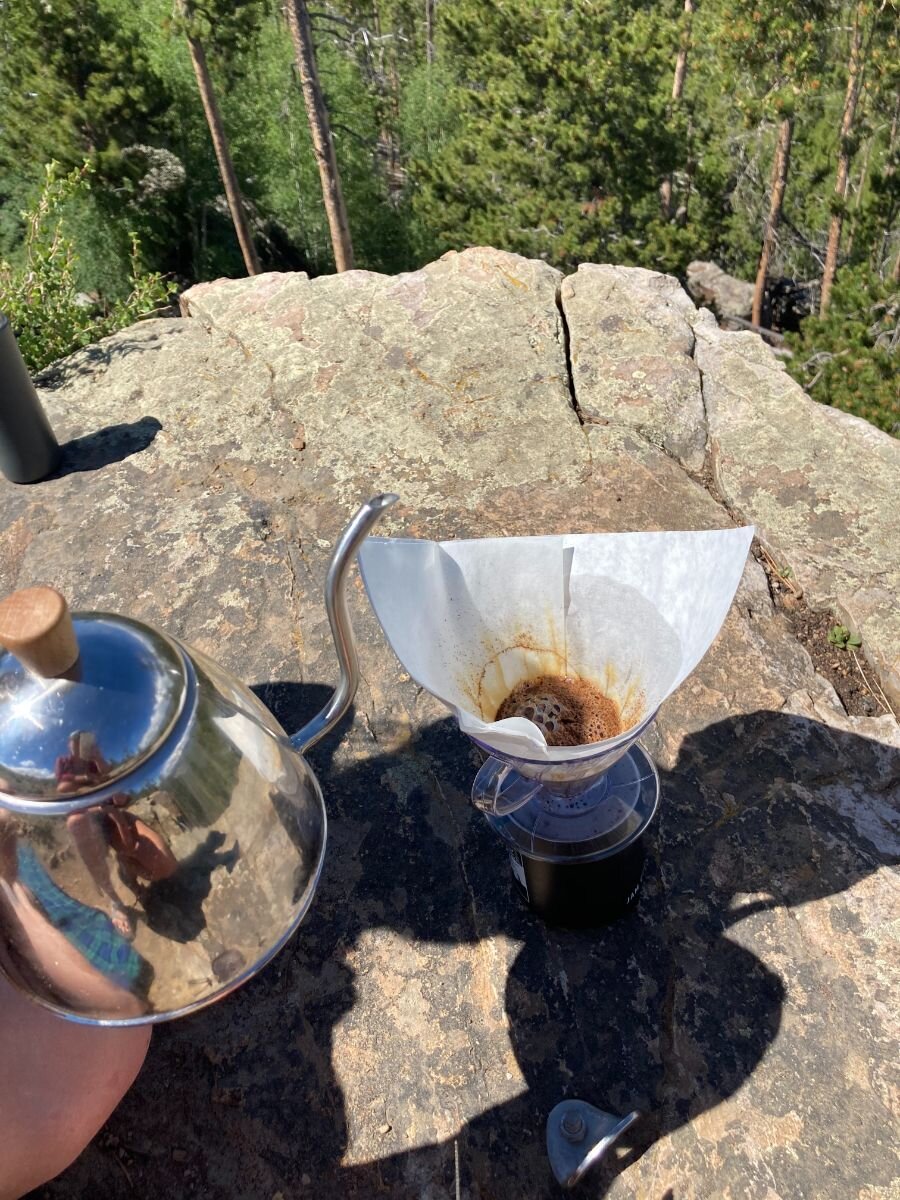
The Hario V60 Pour Over is a simple coffee brewer. First, perch the plastic, cone-shaped coffee dripper. Fit it with a paper filter over your mug or a carafe. Then pour hot water over the grounds to brew your coffee.
Compare prices of the Hario V60 Pour Over
The Hario V60 plastic is a lightweight version of the barista classic ceramic V60. This makes it more portable to outdoor locations. Photo courtesy Stasia Stockwell.
The V60 coffee dripper comes in three sizes: 01, 02, and 03. We tested the 02 size, which can brew one to three cups of coffee at a time, and found this to be the ideal balance of versatility and packability.
When brewed properly, the V60 makes a delicious, evenly extracted, clean and bright cup of drip coffee. No sludge is left in the cup thanks to the paper filter.
While the V60 is simple to use, honing your technique will enhance the overall flavor of your coffee. To get an even extraction, you must pour the water slowly in small circles, evenly hitting all the coffee grounds with water. This process can take practice, but it’s not complicated. With these steps, the V60 tied with the AeroPress for the best overall flavor in our comparative taste test.
Clean-up for the Hairo is easy. Remove the filter with the grounds and place them in the trash. When camping or in the backcountry, you will have paper filters to pack out your used filter and grounds. But we think that’s a sacrifice worth making for better-tasting coffee.
Washing with clean water isn’t necessary with the V60 since the paper filter keeps the grounds contained. However, you can give it a quick rinse if you’re at home or if conserving water isn’t a concern at your campsite.
The V60 is made of BPA-free plastic and weighs just 3 oz--the second lightest weight coffee maker we tested. However, while it’s light, it is not the most packable in our test. The cone shape can be precarious to fit in a backpack for hiking it into camp, though it’s possible.
For car camping, the V60 is no hassle at all to pack. After several camping trips, the plastic proved durable and returned to the kitchen good as new. While this plastic seems slightly more prone to cracking than the plastic on the AeroPress, we had no issues and suspect this brewer will last many seasons of camping as long as it is not crushed beneath all your gear.
While the V60 brews equally delicious coffee compared to the AeroPress, the AeroPress inched its way to our top pick primarily because of its versatility and ease of use. What the V60 boasts is a lighter weight and a much lower price point. For the price, we’re hard-pressed to find a better coffee brewer.
Best Coffee Maker for Backpacking:
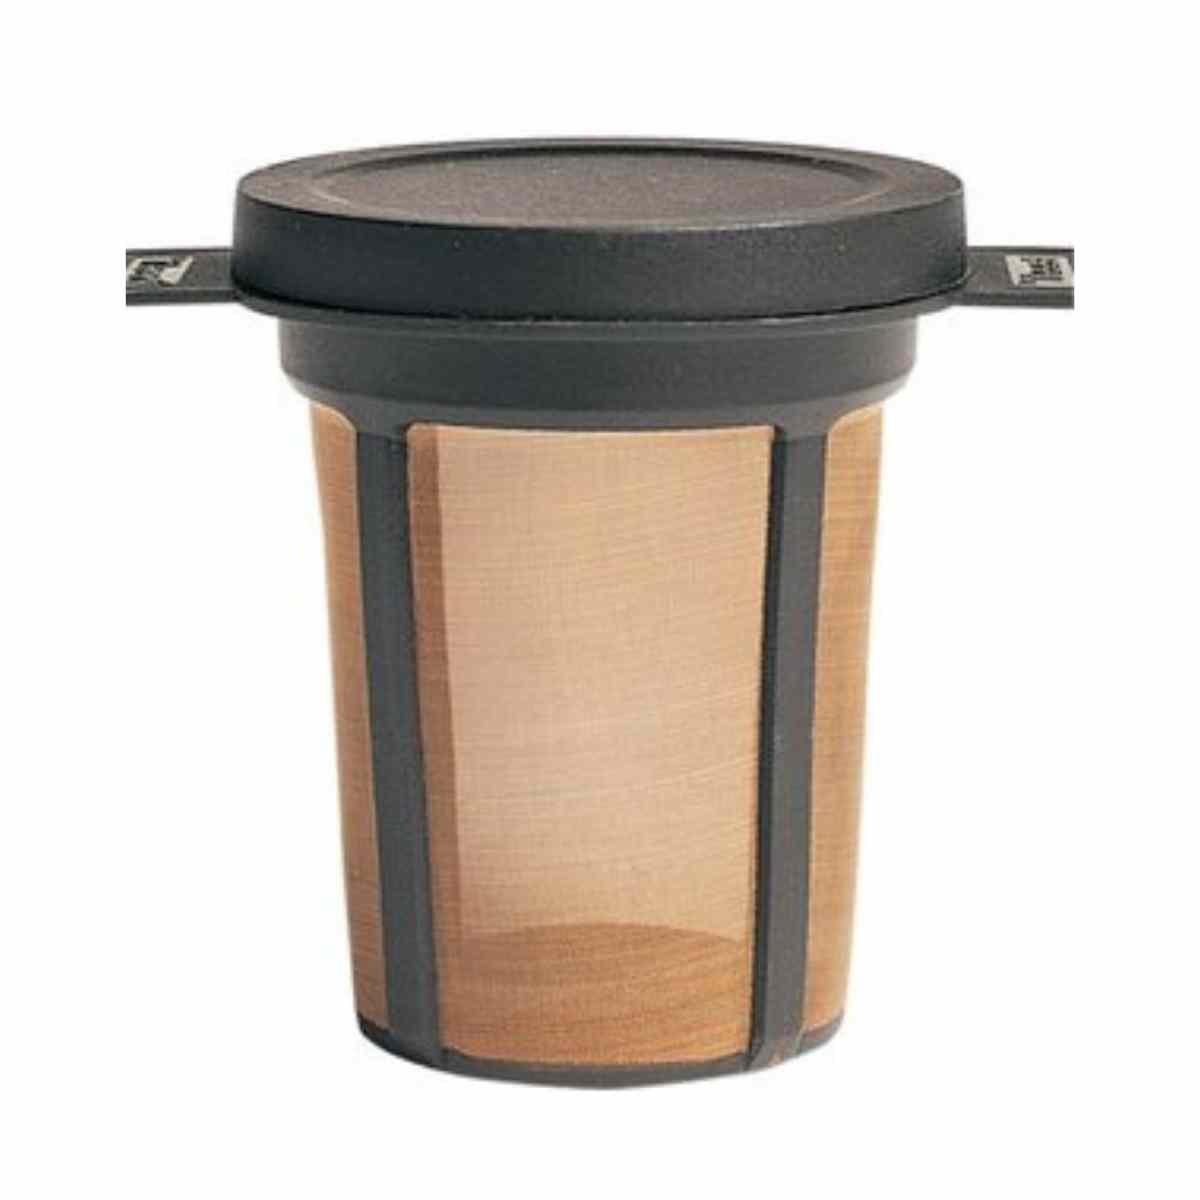
MSR Mugmate
Brew Type: Steep
Weight: .98 oz (filter only--bring your own mug)
Serving Size: 1 cup
Filter Type: Mesh
What we liked: Lightweight, no need for filters, versatile
What we didn’t like: Doesn’t come with mug
If you’re willing to sacrifice a bit of weight and space in your pack to forgo lackluster instant coffee or messy cowboy coffee, then we think the MSR Mugmate is your best option for the coffee drinker who wants to bring good coffee deep into the backcountry.
This little one-cup brewing device fits in the palm of your hand and weighs just 1 oz. Coffee grounds are placed inside the mesh metal filter and steeped in hot water for a smooth and strong cup. (We found that giving the grounds a good stir once placed in a camping mug of hot water helped get proper extraction from the coffee.)
Compare prices of the MSR Mugmate
We were impressed by the quality of coffee the MSR Mugmate was able to brew. Photo courtesy Stasia Stockwell.
The filter design of the Mugmate means you don’t have to carry in or pack out paper filters, which is a big bonus for backpacking. Because of this, you may find a small amount of sludge in the bottom of your mug, similar to a french press brew. To clean after a brew, just toss coffee grounds from the filter into the trash. A small splash of water will help remove any remaining grounds from the filter.
Another reason we love the Mugmate is for its versatility. Brew a fresh cup of coffee in the morning, then steep tea leaves before bed and avoid plastic and paper wrappers that come with many tea bags. When backpacking and camping, we found ourselves using the Mugmate for tea just as often as we did for coffee.
When it comes to durability, the Mugmate was put through the wringer and passed the test. Our writer used this portable coffee maker almost daily over multiple seasons of backcountry guiding in Alaska. She used it as a travel coffee maker on several road trips and camping trips across the west. She's stashed it in her pack for dozens of backpacking trips, from Colorado and Utah to Hawaii and Alaska. Even when the Mugmate was tossed in a backpacking pack or travel duffel, it never broke or showed any major damage.
Related: Best Travel Backpacks
It’s worth noting that there are backpacking brew systems that are lighter and more packable than the Mugmate, like the GSI Ultralight Java Drip (see review below). However, we found these to be often more finicky to use. We also found other brewed coffee wasn’t quite as good as on the MugMate. They also did not boast the same versatility as the Mugmate.
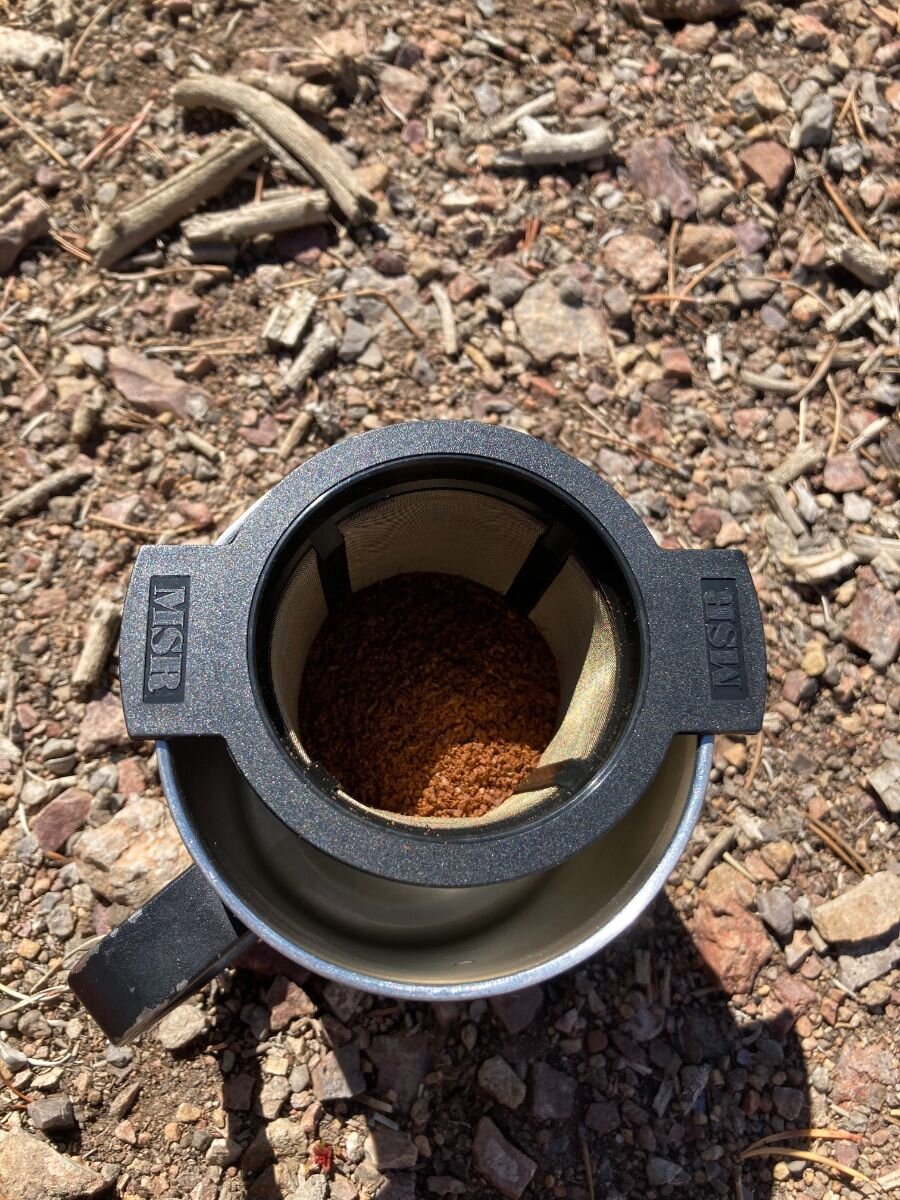
The Mugmate coffeemaker works with most mugs, cups, pots, or water bottles to brew delicious coffee on the go. Photo courtesy Stasia Stockwell.
In our side-by-side taste test comparison, the Mugmate hung with the best and ranked third, behind the AeroPress/AeroPress Go and Hario V60.
It’s worth noting that the MSR Mugmate is just a filter and doesn’t come with its own mug. However, this versatile system works with cups and water bottles of all sizes. We’ve seen it used with Nalgenes, Klean Kanteens, and even Hydro Flask water bottles. Likewise, we’ve seen the Mugmate fit GSI mugs, Snow Peak mugs, and of course, MSR mugs. One tip is if your mug is too big, set a long-handled camp spoon across the rim and rest the Mugmate on top.
Related: Best Water Bottles
Overall, the downsides to the Mugmate are few and more than reasonable to bring good coffee along on the trail. You won’t get as clean of a cup as you do with brewers that use a paper filter, but it will be much smaller and lighter than those options. It won’t be as light as a packet of instant coffee, but the resulting brew will taste far fresher with a well-rounded flavor profile. If good coffee is a must no matter where you are or how far you hike, then the Mugmate is what we’re bringing along.
Best Camping Coffee Maker for Groups:
GSI Outdoors Enamelware Percolator

Brew Type: Percolator
Weight: 21 oz or 26 oz
Serving Size: 8 cups or 12 cup
Filter Type: None needed
What we liked: Makes a lot, price, can put over a campfire or a stovetop, fun to use, no filter
What we didn't like: A pain to clean, not small or light, coffee doesn't taste as good as single-cup options
If you’re making coffee for the whole crew at your campsite, you won’t want to use a small, single-serve brewer unless you don’t mind having your whole morning consumed by brewing coffee for caffeine-hungry campers. The easiest way to brew a big pot of coffee at camp is with a stovetop percolator, and our favorite is the GSI Outdoors Enamelware Percolator.
Compare prices of the GSI Outdoors Enamelware Percolator
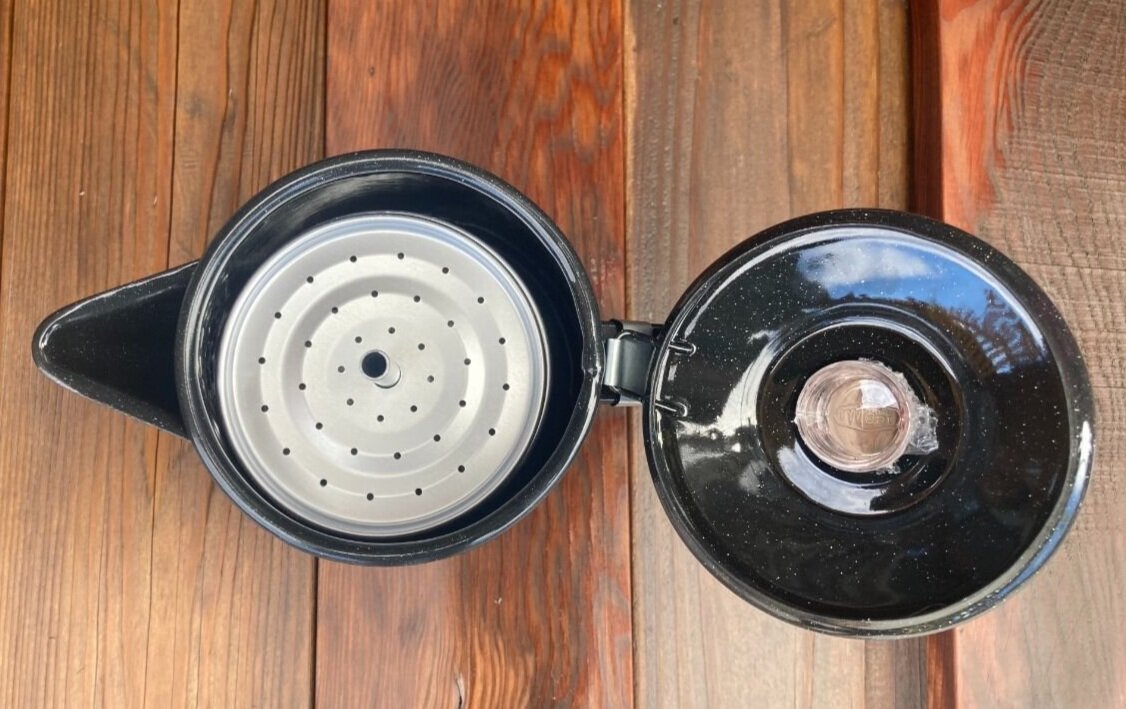
The GSI percolator does not require any paper filters, which means there’s less to worry about packing and less to fill your trash bag at the end of the trip. Photo courtesy Stasia Stockwell.
To get full-flavored coffee, you do need to make sure to give the brew enough time. While it takes several minutes to get a full coffee pot, this time is hands-off, so you can start prepping breakfast while the coffee brews on your camping stove.
The GSI percolator does not require any paper filters, which means there’s less to worry about packing and less to fill your trash bag at the end of the trip. Like the metal mesh filter of the MSR Mugmate or the metal filters standard in french press makers, this coffee percolator does allow for some sediment to get through, but it makes for a nice robust flavor.
If you’re making coffee for the whole crew at your campsite, a percolator is a hands-off way that can brew 10 or 12 cups. Photo courtesy Stasia Stockwell.
Because it’s made of enameled steel, this stovetop percolator is far from small and light (backpacking with it is a no-go). But, it’s very durable and offers a great classic camp style to boot. Despite being a companion on car camping trips, my percolator still brews good as new.
In our taste test, the GSI coffee percolator did not rank as high as other camp coffee makers like the AeroPress and Hario V60. But it still brewed a nice pot of coffee for everyone to enjoy without much effort from the camp kitchen chef.
While several brands offer similar-looking cast steel enamelware percolators, the GSI Percolator is considered the gold standard and consistently has the best ratings.
If you’re looking for a workhorse camping coffee maker that will last years and make enough coffee for the whole family at once, the GSI Enamelware Percolator is a solid option.
Best Camp French Press:
Stanley Classic Stay Hot French Press

Brew Type: French press
Weight: 2.5 lbs
Serving Size: 6 (holds 48 oz)
Filter Type: None needed
What we liked: Durable, insulated, serves multiple people
What we didn’t: On the large and heavy side
The Stanley Classic Stay Hot French Press is everything you could hope for in a solid camp coffee maker. It holds enough to caffeinate a couple of coffee chuggers or even a group. The French press style is easy to use and simple to clean. Most of all, it’s durable and good at keeping coffee warm long after it’s been brewed. If weight isn’t a concern, this coffee maker is an excellent choice.
Compare prices of the Stanley Classic Stay Hot French Press
Specs and Features
This French press is double-wall insulated, which means a couple of things: yes, it’s on the heavy side, but it also will keep your coffee much hotter than a single-walled version, including the common glass ones you might use at home. This makes it ideal for camp when the mornings often have a chill to them.
The size of the Stay Hot French Press, at 48 oz, is large enough to keep coffee flowing for a group of people, but not so large that you wouldn’t mind bringing it even for just two campers. If you’re consistently camping with large groups, the GSI Percolator holds more and is ideal for lots of coffee drinkers wanting their morning brew at once.
Ideal Use
Like most other French presses, a coarse grind on your beans is recommended to get the best taste and least amount of sediment. When brewed with the proper ratio of beans and water, this produces a very tasty cup of coffee, especially for those who like the way a press brews. If you prefer a cleaner taste to your coffee (without lingering sediment and oils), consider another brewing method that uses a paper filter. But this brews coffee just as well as any French press we’ve tried.

The inside of the Stanley French press. By Stasia Stockwell
The real benefit to this brewer is the double-walled insulation. This means you can hot hold coffee for at least a couple of hours, if you like to enjoy slow mornings at camp. To get the best results and hottest coffee for the longest amount of time, we recommend pre-warming the press by pouring some hot water inside to warm the interior metal walls, then dump it out just before starting your brew.
We tested the Stay Hot French Press on multiple camp-out sessions, including early mornings and long days spent tailgating at a ski resort in cold temps. The coffee in the press stayed hot for over two hours when left inside a cold car (with below freezing outside temps). After a couple hours, the coffee turned to lukewarm and was less desirable. But, to get the best flavor from your coffee, you don’t want it to sit much longer than that anyway.
Clean-up is like any other French press: discard the grounds (in the trash, not on the ground!) and rinse it out. There is no paper filter to worry about, but that does mean it might take a bit more time to clean all the loose grounds out of the pot.

Testing the Stanley Classic Stay Hot French Press while tailgating at a ski resort on a cold day in Colorado. By Stasia Stockwell
Conclusion
There are only minor downsides to this coffee maker. If you need something light and packable, look elsewhere. This is one of the heaviest and bulkiest in our test. But that generally matters a bit less for car camping than for backpacking anyway. It’s also not the most affordable in our test, but we do think it offers good value given the usefulness and durability.
This press is made with burly, double-walled stainless steel and can certainly take a beating. It’s a piece of camp kitchen that should last many years, if not decades. If you’re a French press coffee lover, then this is the best one to pack to the campsite. It’s durable, brews well, and keeps ample coffee on tap and hot when you need it.
OTHER COFFEEMAKERS WE CONSIDERED
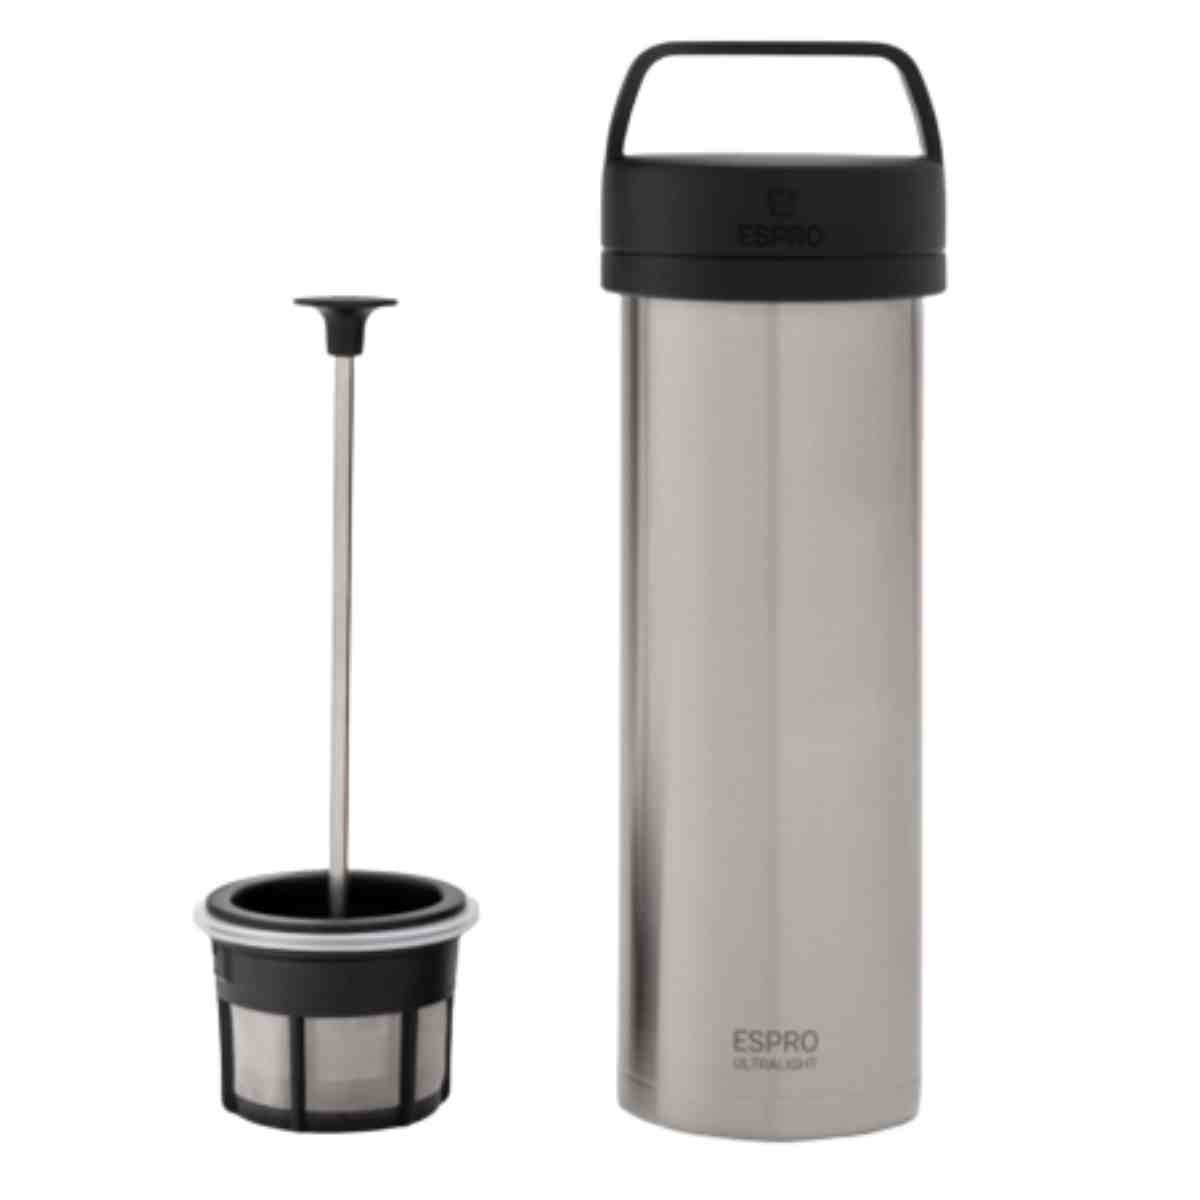
ESPRO Ultralight
Brew Type: French press
Weight: 7.4 oz
Serving Size: 1 cup
Filter Type: None needed
French press coffee makers don’t have to be delicate and made of glass, like the one from your favorite cafe. Nor do they need to be overly cumbersome and heavy. The ESPRO Ultralight proves that you can have delicious french press coffee in a light and compact vessel.
The ESPRO is a French press system designed specifically for travel. However, the Ultralight takes it a step further than other travel coffee makers. This coffee press is light and small enough to take camping and even backpacking if weight isn’t a top priority. At 7.4 oz. and the size of a thin water bottle, this coffee maker doubles as a camping mug and can carry a half-liter of water on the trail when it’s not being used for coffee.
Compare prices of the ESPRO Ultralight
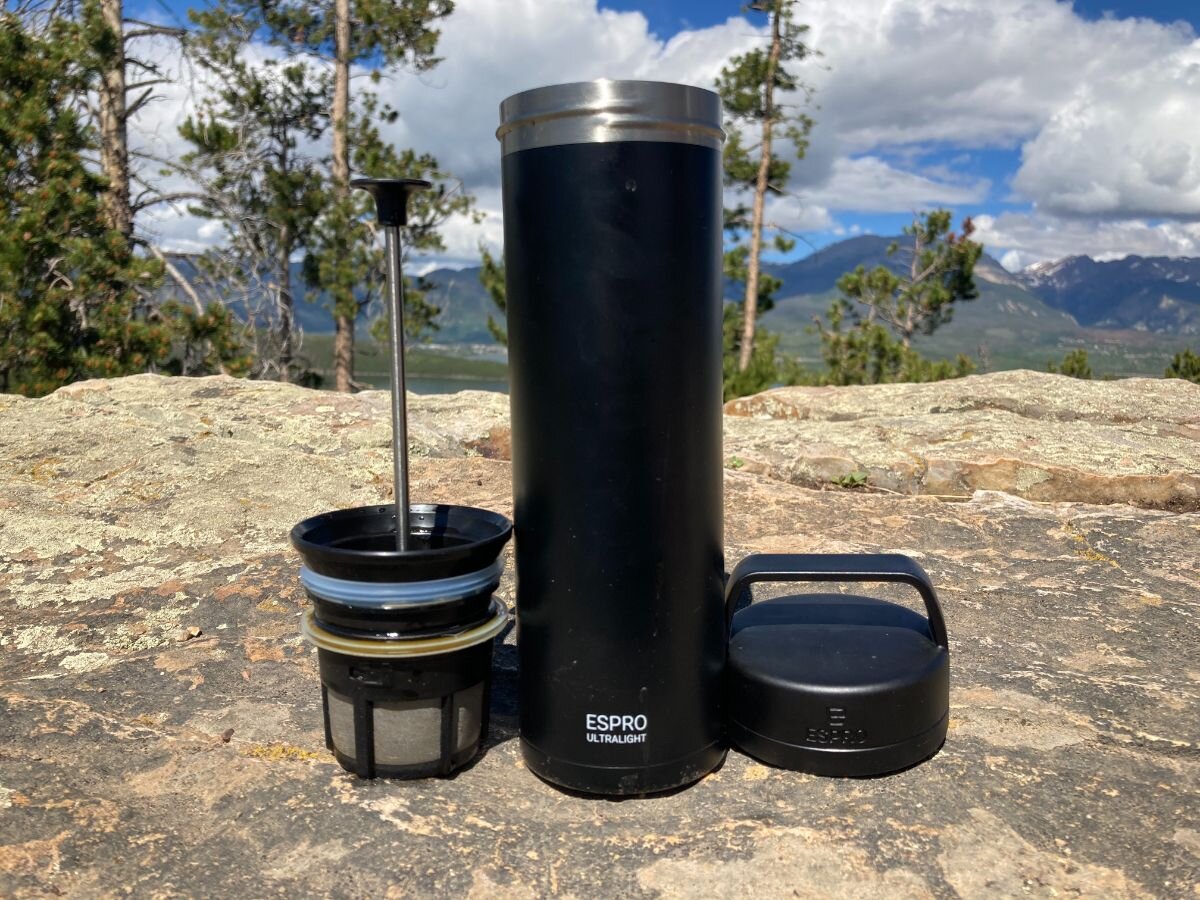
The ESPRO includes a built-in french press with one of the best filters we’ve seen on a French Press, including ones made of glass and metal. It also includes a vacuum insulated mug on the ESPRO that will keep coffee hot for hours. Photo courtesy Stasia Stockwell.
What really makes this coffee press stand out is the filter. A basket-shaped, dual-layer fine mesh filter helps the ESPRO Ultralight brew some of the smoothest and cleanest tasting french press coffee we’ve had.
We attribute its great flavor to the doubled-up fine filters, which let minimal coffee residue through to the final cup. Once the coffee is pressed, extraction stops completely to avoid bitterness.
The doubled-up fine filters on the ESPRO Ultralight kept grounds out of our coffee better than integrated press systems like MSR’s Coffee Kit for the Reactor stove or Coffee Kit for the Windburner stove or the Jetboil Flash Java Kit. These coffee presses work by integrating with your cooking pot for backpacking.
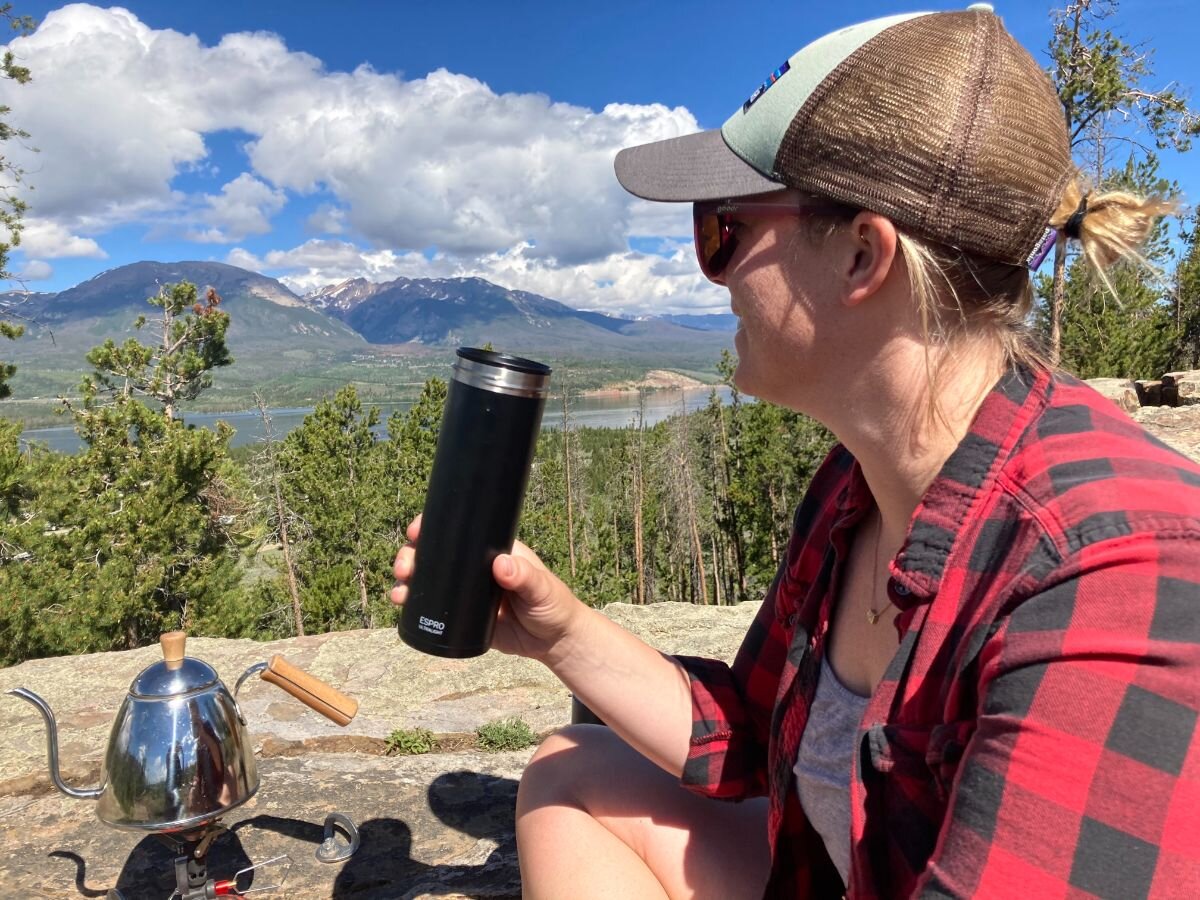
The included vacuum insulated mug with a lid with a handle make the ESPRO ideal not just for camp, but as a travel coffeemaker or for taking on the go. Photo courtesy Stasia Stockwell.
The ESPRO Ultralight travel mug is also vacuum insulated to keep coffee hot for hours after brewing.
No paper filters are needed for the ESPRO, and cleanup is quick but not as hassle-free as the AeroPress. To wash, dump grinds from the bottom of the coffee mug into the trash and give the mug a good rinse.
In our taste test, the ESPRO stood out for its smooth flavor. While it didn’t quite beat out paper filter brewers, like the AeroPress and Hario V60, it was the best french pressed coffee we’d had.
That excellent flavor and travel-friendly design make it one of the most highly-rated coffee makers in both the outdoor world and the kitchen appliance world.
Additional features like a lid with a handle make the ESPRO Ultralight ideal for traveling and taking coffee on the go. So if you’re the type who likes to sip your coffee slow and maybe even take it on the trail, this brewer is an excellent option.

Brew Type: Pour Over
Weight: 0.4 oz
Serving Size: 1 cup
Filter Type: None needed
The GSI Ultralight Java Drip is a backpacking-oriented coffee brewer designed to be one of the lightest and most packable coffee makers you’ll find. It brews pour-over style drip coffee with reasonably good flavor in a very compact package. So if instant coffee isn’t for you and you want a brewing system that’s as small and light as possible, consider the GSI Ultralight Java Drip.
Ultimately, we found that the MSR Mugmate was easier to use and brewed a better tasting, more robust cup of coffee than the Ultralight Java Drip, which is why it won our pick for backpacking.
Compare prices of the GSI Ultralight Java Drip
Brew Type: French press
Weight: 16.1 oz
Serving Size: 8 cups
Filter Type: None
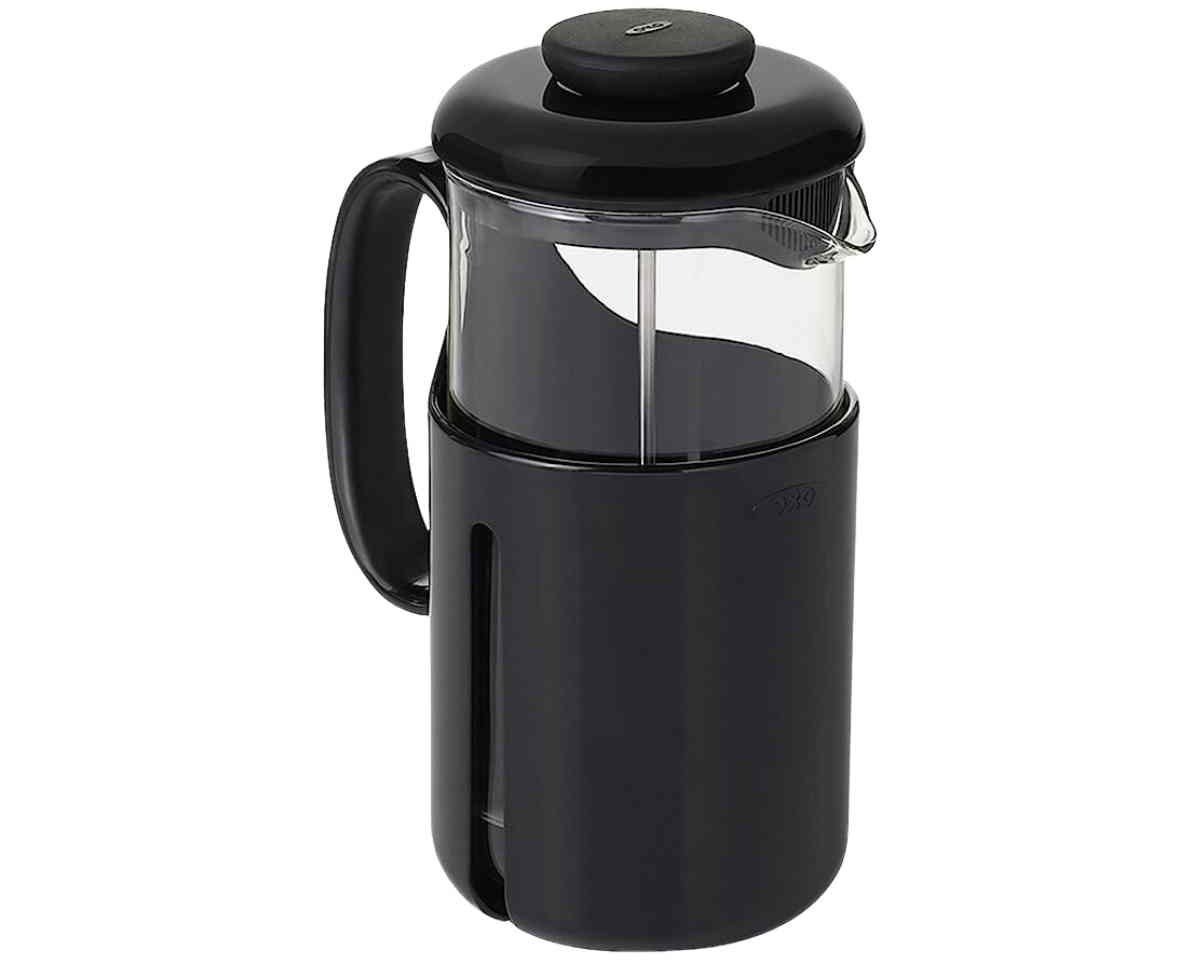
We tested the OXO Campgrounds French Press as a contender for two categories: Best French Press for Camping and Best for Group Camping. Its large size can accommodate up to 8 cups, which isn't quite as much as the percolator that won that category, but does make a lot of coffee. Ultimately, we found that like most French Press (including the glass ones you find at coffee shops), it's hard to keep grounds from getting into your coffee. Ultimately, we found the Stanley Stay Hot and the ESPRO both offer a smoother and cleaner tasting french press coffee.
Compare prices of the OXO Campgrounds French Press
Brew Type: pour over
Weight: 4 oz
Serving Size: 1-2 cups
Filter Type: mesh
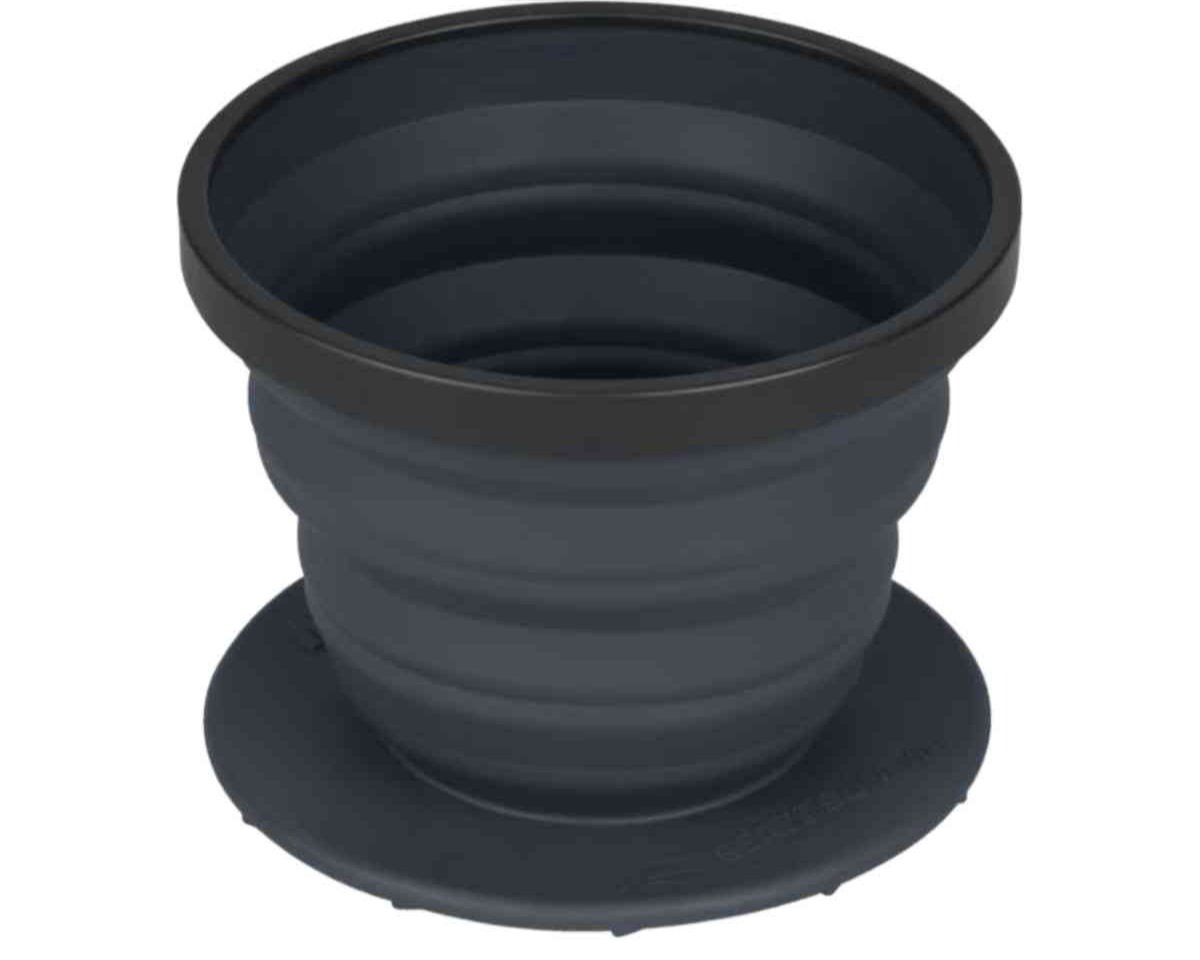
The Sea to Summit XBrew is an innovative coffee dripper made of silicone. This silicone pour over coffeemaker collapses to a flat disc (well, 20 mm) for easy packing. It has a built-in metal mesh 180-micron filter so you don't have to worry about packing filters. Simply dump the grounds and rinse out when you're done. Ultimately, we found the less expensive Hario to brew a better cup of pour over coffee. Still, we appreciated the Sea to Summit XBrew's clever design, especially when space is at a premium.
VIEW THE SEA TO SUMMIT XBREW

Brew Type: Pour over
Weight: 9.6 oz (for just the brewer)
Serving Size: 1
Filter Type: None needed
This Stanley pour over set is an aesthetic brewing system that combines a pour-over-like brewer with an insulated mug. But rather than a typical pour-over, which uses a paper filter, the Perfect-Brew has a fine metal filter that looks a little like a large bullet.
Compare prices of the Stanley Classic Perfect-Brew Pour Over Set

Because this pour over is made with stainless steel, it is durable, as is the mug it comes with. This does mean that it is heavier than other pour overs we tested, like the Hario, which we’d argue is light enough for non-ultralight backpacking trips.

Ultimately, if you want a durable and nice-looking single-serving brewing system, this option isn’t bad, but there are better options out there that are lighter, cost less, and brew a better tasting cup.
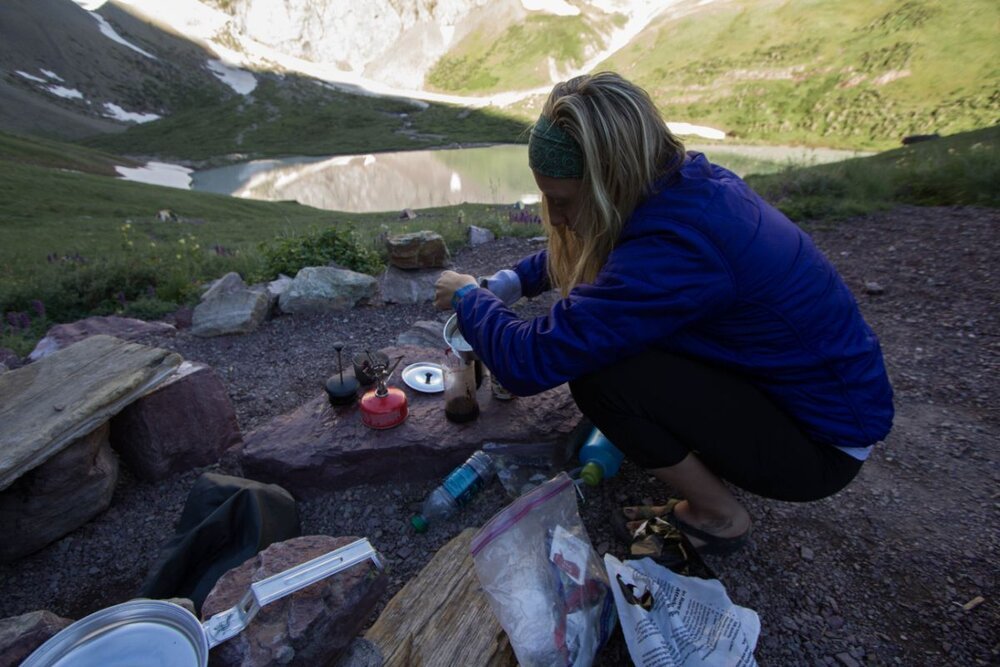
To get the most flavor out of your coffee beans, it is best to grind beans fresh just before brewing. Here, the author uses a hand grinder to grind coffee beans in camp. Photo courtesy Stasia Stockwell.
Basics of Good Coffee
Good coffee is reasonably simple to brew; you just have to know the basics.
Coffee Beans
First, your beans: freshly roasted coffee made from quality coffee beans is always best.
Seek out small roasters that have direct relationships with their coffee farmers for the best selection, and look at the roast date on the bag of coffee. It’s best enjoyed within two weeks to, at most, a month after roasting.
Grinding
The second element to consider is grinding. It’s best to grind coffee beans fresh just before brewing, though that’s not always a viable option on backcountry trips.
If you don’t mind the extra weight and work of bringing a hand coffee grinder on the trail to have coffee fresh at camp, consider something like the highly sought-after GSI Outdoors JavaGrind Coffee Grinder or Snow Peak Field Barista Coffee Grinder.
But if you prefer to keep it simple and pack pre-ground coffee, wait until just before you leave on your trip to grind them for the best possible freshness.
Water
Third, think about your water. If you’re camping or backpacking, you’ll likely filter your water from a fresh source. Water that is thoroughly filtered makes the best tasting coffee.
Read more: Best Water Filters and Water Purifiers for Backpacking
Then, you’ll need to get that water to the perfect brewing temperature. The ideal temp for coffee brewing is around 200°F (just under sea-level boiling temp).
Especially when brewing in the mountains, you’ll want to account for boiling temperatures at altitude. While water boils at 212°F at sea level, this changes as you go up in elevation. For example, at 5,280 feet in Denver, water boils right around 202°F; but, higher up in the Rockies in Breckenridge, where I live at 9,600 feet, the boiling temperature is only 194°F.
So, if you’re camping on the beach, brew with water that’s just about to boil. If you’re high up in the mountains, let the water come to a rolling boil before brewing.
Related: Best Backpacking Stoves
Coffee to Water Ratio
There is a term often called the “Golden Ratio” in coffee brewing, which refers to the ideal amount of coffee and water for brewing.
Numerically speaking, the ratio is right around 1:16 coffee to water. This means you should be brewing with 16 grams of water for each gram of ground coffee.
This ratio translates to about “one to two tablespoons of ground coffee for every six ounces of water,” according to the National Coffee Association and the Specialty Coffee Association. We know you’re unlikely to pack a kitchen scale with the tent poles, so keep this general rule of thumb in mind when brewing in the backcountry.
The Aero Press uses a plunger-like device to push hot water through the coffee grounds, a process referred to as forced extraction in the coffee world. Photo courtesy Stasia Stockwell.
Methods of Coffee Extraction
Finally, the basics of good coffee depend on your brewing device. There are several types of coffee brewing systems out there, but most coffee maker systems fall under three main categories based on how the coffee is extracted.
Percolation
Percolation is what we most often associate with coffee brewing. This happens when hot water passes through a bed of grinds with gravity, forcing the water through the coffee. A standard drip coffee maker found commonly in people’s homes or at cafes is a type of percolation brewer.
Some travel coffee makers, such as a typical RV coffee maker, also uses a percolation. The difference is that an RV coffee maker is often a single-serve, smaller version of a home drip coffee machine.
While some percolation brewers require electricity, many others do not, including most pour-over brewers such as the Hario V60 Pour Over or Chemex brewers.
Percolation brewers also include camp coffee maker standards, like the GSI Enamelware Percolator.
Immersion
Immersion brewers allow coffee to steep, much like tea, in hot water. The most common type of immersion brewer is a French press, like the ESPRO Ultralight.
Forced Extraction and Espresso
Espresso from an espresso machine is brewed with forced extraction, meaning the brewing process happens much quicker than other extraction methods. With an espresso maker, water is forced through the coffee with more than just gravity.
Another forced extraction brewer is the Aeropress, which uses a plunger-like mechanism to force hot water through the coffee manually.
The MSR Mugmate shown here incorporates aspects of a pourover and steeping, two methods of brewing coffee. Photo courtesy Stasia Stockwell.
Types of Brewing Systems
Within the methods of extraction mentioned above, there are many types of brewing systems for coffee. These are the most common ones and ones we considered in our research and testing to find the best camping coffee makers for this review.
Pour Over
Pour over coffee brewers are just what the name implies: hot water is poured over a bed of grounds that sit in a brewing device, and the coffee drips from the bottom of the brewer into a pot or your mug.
Types of pour overs include the Hario V60, the GSI Ultralight Java Drip, and the Sea to Summit X-Brew. Many pour over coffee makers, like the Hario V60, will require a paper filter. Others, like the GSI Ultralight Java Drip, have a built-in coffee filter.
French Press
French press brewers allow the coffee grounds to float freely during extraction inside a container-like a glass pitcher in traditional French press models or a stainless travel mug like the ESPRO models. The coffee grounds are then pressed down with a mesh metal filter to stop extraction and separate the grounds from the brewed coffee. French presses do not require paper filters since the filter is built into the brewing system.
In the camping and backpacking world, several french press systems are designed to integrate with camping pots and stoves. Examples are the Coffee Kit for the Reactor stove or Coffee Kit for the Windburner stove or the Jetboil Flash Java Kit.
Percolator
Percolator coffee pots allow boiling water from the pot to pass through a coffee ground bed that sits in a filter basket near the top of the pot. The extraction process is similar to pour over, though you don’t have to pour the water over the grounds manually.
The GSI Enamelware Percolator is an example of this brewing method. Most camping-specific percolators do not require paper filters. Instead, the metal basket that holds the grounds acts as a reusable filter.
AeroPress
The Aeropress is a specific type of brewing system that finds itself in a category all its own. This brewing device is part immersion brewer and partly forced extraction since it uses a plunger to force hot water through the coffee grounds after the grounds are immersed in hot water.
The Aeropress requires very small paper filters for each brew. (You can purchase reusable mesh metal filters, but the flavor is much better when brewed with a paper filter.)
Stovetop Espresso
The stovetop espresso maker (sometimes referred to as a moka pot) works much like a reverse percolator. Water is placed in a chamber at the bottom of the pot below the ground coffee, and a fine mesh filter separates the two.
When the water comes to a boil, it’s forced up through the grounds and trickles out into an upper chamber that holds the brewed espresso. Paper filters are not needed for this type of brewing system.
A classic stovetop espresso maker is the Bialetti Musa. While designed for a home stovetop, it's just as easy to use on a camping stove.

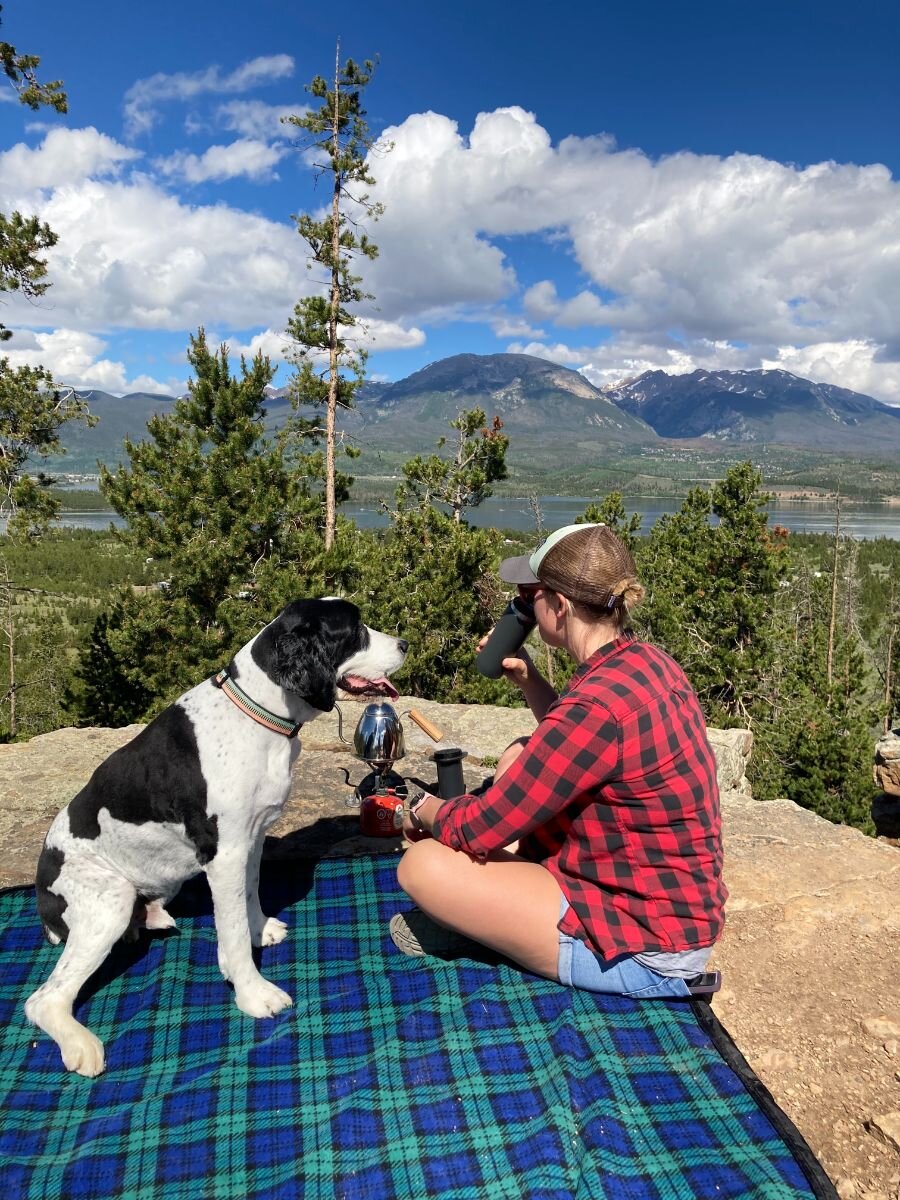
The best camp coffeemaker will depend on how you like to get outdoors, who you like to spend time with, and how strong you like your coffee. Photo courtesy Stasia Stockwell.
How to Choose the Right Camp Coffee Brewer for You
It can be tough to decide on the right camp coffee brewer for your needs with so many options.
The first thing to consider is when you’ll use the camping coffee maker most often. For example, if you’re backpacking, a heavy metal percolator is probably off the table; something light and packable like the MSR Mugmate will be much more suitable.
However, if you’re planning to car camp with large groups, a percolator like the GSI Enamelware will be ideal for making several cups at once without much fuss.
If the taste is paramount, a one-cup brewer like the Aeropress or Hario V60 will brew the best-tasting coffee.
No matter how you brew your coffee, when you’re camping in backcountry environments, it is essential to pack out all your used filters and grounds. Photo courtesy Stasia Stockwell.
Coffee Waste Disposal and LNT in the Backcountry
It’s essential to know how to dispose of your used camp coffee grounds in the backcountry. As with any camp cooking, we stress using Leave No Trace Practices. This means packing out all your trash, including used coffee filters and grounds.
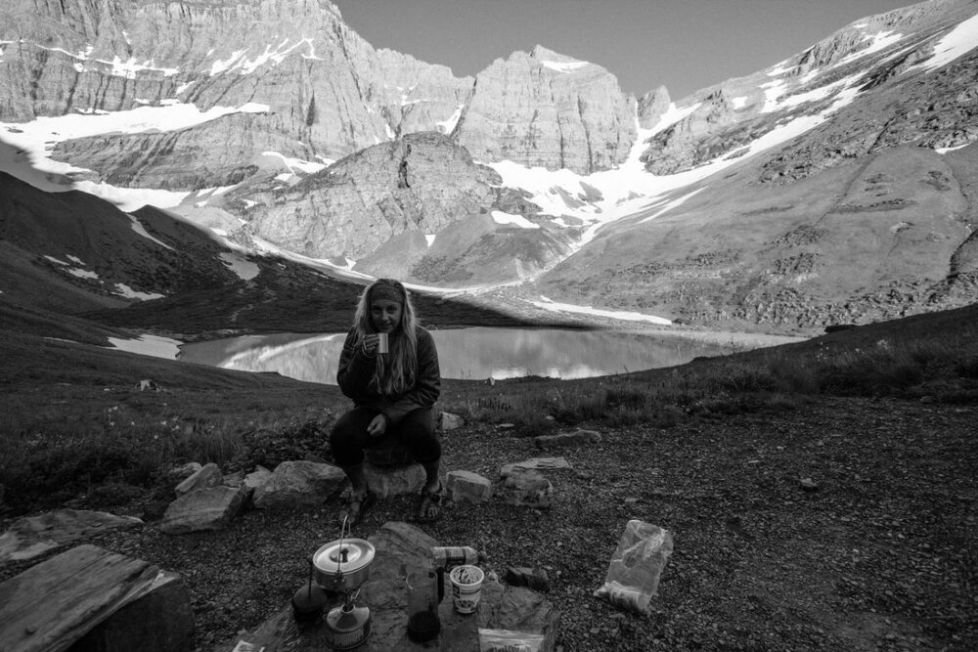
The author making camp coffee in Glacier National Park. Photo courtesy Stasia Stockwell.
Brewing Basics: How to Make a Good Cup of Coffee
Depending on the brewing device you’re using, brewing the perfect cup of coffee can take a little practice.
Coffee to Water Ratio
First, always remember to use the Golden Ratio of 1:16 coffee to water when measuring out your ground coffee and water. Use coffee beans that are freshly roasted and ground as fresh as possible for the best results.
Grind
Grind size is important to perfectly brewed coffee. Different brewing systems will require different-sized grinds for the coffee beans. For example, a French Press like the ESPRO Ultralight will need a more coarse grind, while a stovetop espresso maker or Aeropress will need a finer grind, and a pour over will do best with something in between.
Paper Filters vs. Metal and mesh Filters
While paper filters create more waste with coffee making in the backcountry, they also contribute to better, more balanced flavor and a cleaner-tasting cup of coffee free of residue and sludge.
For camping and backpacking purposes, reusable mesh filters like the MSR Mugmate and metal filters have strong advantages.
But when it comes to flavor and preventing sludge build-up in your cup, we favor coffee brewed with a paper filter. (It’s worth noting that unbleached paper filters are compostable, which is a bonus, but they leave behind a bit more paper taste in your coffee than bleached ones.)
Water Kettle
It’s worth noting that some kettles will do much better than others for brewing coffee. Kettles with a gooseneck spout will allow you to pour water with precision, resulting in evenly extracted and properly brewed coffee, especially with pour over coffee.
Our best budget coffee maker, the Hario V60 plastic, has a blooming technique that requires some practice, but can make an incredible cup of coffee. Photo courtesy Stasia Stockwell.
Coffee Blooming
Blooming is a term that refers to degassing the coffee grounds. Coffee grounds will release gasses when brewed, and letting this occur at the beginning of the brewing process will result in a better-tasting cup. Blooming technique is the same for most brewing devices, though it’s not possible to do with a percolator coffee pot or stovetop espresso maker.
To bloom coffee, thoroughly soak grounds with a few grams of water and allow the grounds to bubble and release the gasses for about 30-45 seconds. Then, proceed to brew with the remaining amount of water.
Technique
If you’re brewing in a pour over device like the Hario V60, it may take a little practice to get the pouring technique down. Use a gentle swirling motion to pour the water and evenly soak the coffee grounds for the best extraction. If you’re using a paper filter, be sure not to let the water crest the top of the filter, which will allow the grounds to enter the finished cup.
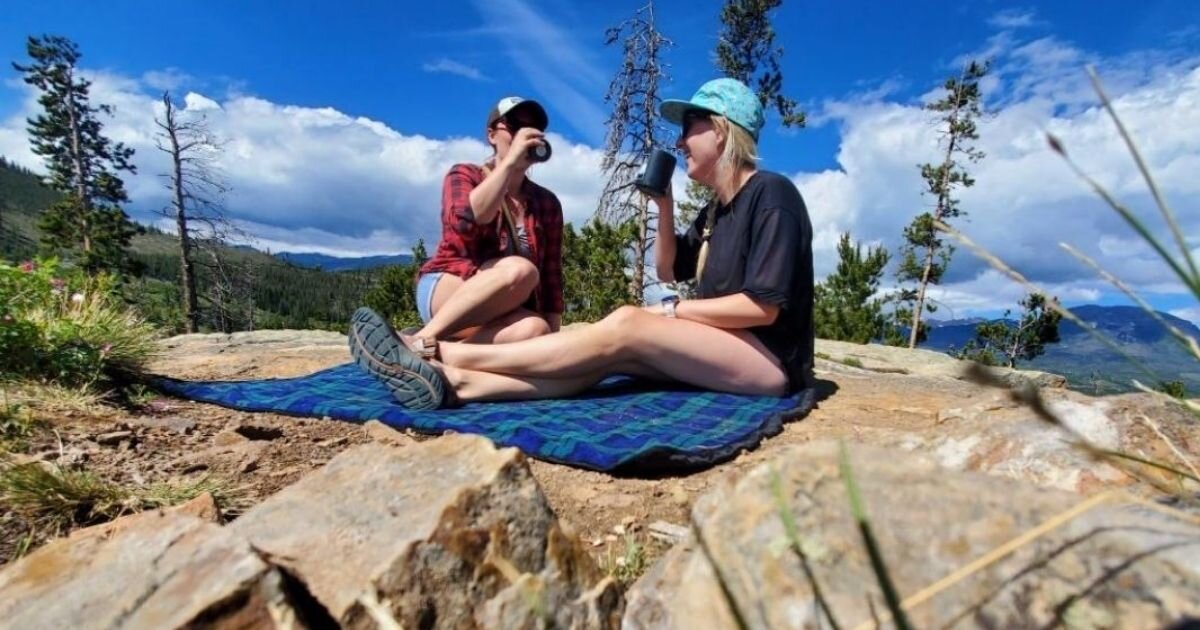
Whether camping, backpacking, bikepacking, or on a dayhike with friends, a freshly brewed cup of coffee and time with friends can enhance any outdoor experience. Photo courtesy Stasia Stockwell.
How to Taste Coffee
Coffee produces three primary flavors, with many nuances that come within those flavors. The primary three flavors of coffee are acidity, sweetness, and bitterness. Good coffee should always have both acidity and sweetness, but never bitterness.
Bitterness only comes out when coffee is over-extracted and not properly brewed. This can be avoided by considering your techniques and recipe, like grind size, and following the golden ratio. See our section on How to Make Good Coffee for details.
With a hot cup of coffee in front of you, first, swirl the coffee to release aromas, then smell the coffee. What aromas do you notice? Possibly chocolatey notes or hints of fruit? After smelling, take a sip and swish it in your mouth to ensure it covers all your taste buds. Then, take a moment to think about the different flavors.
We tested coffee under real world conditions, like when the dogs want to “help” brew the coffee. Photo courtesy Stasia Stockwell.
How We Researched and Tested
We started with a baseline knowledge of how great coffee should taste when brewed at home or in our favorite coffee shops. We used that knowledge as our primary standard when comparing how different coffeemakers brewed in the field.
From there, we researched dozens of brewing devices--both those designed specifically for camping and ones that weren't. Ultimately, some of those coffeemakers didn’t make the cut to our testing list. Every camping coffee maker on our list had to be suitable to take into the backcountry. Preferably, they generate little waste.
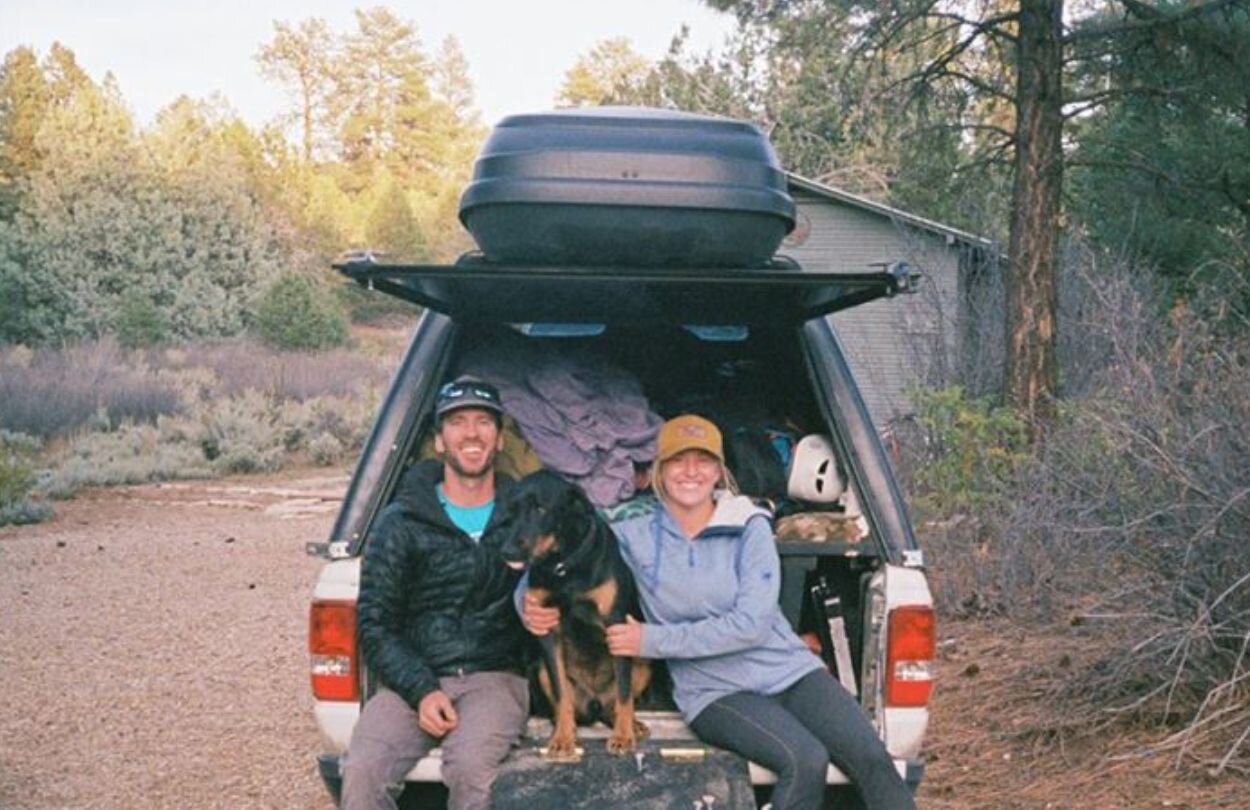
Then, we considered both customer and media reviews to help us select our top contenders. From there, we went out and tested these top models for ourselves. To test coffeemakers, we went lightweight backpacking, car camping, back-of-the-truck camping, and tricked-out-van camping with our coffee in tow.
Finally, we had friends taste coffee from the different brewing devices and rate them based on the overall flavor.
When it came down to it, the flavor was the most important factor. We also factored in weight, packability, durability, ease of use, waste disposal, and price. In the end, we landed on the best camping coffee makers for the perfect cup brewed in the backcountry.
About The Author / Why You Should Trust Us
A true mountain dweller, Stasia Stockwell feels far more at home on a high alpine ridge than a busy city street. Stasia writes primarily in the outdoor and adventure travel realm, focusing on destination content and gear reviews that are intriguing and informative for newcomers and experts alike. She’s worked as a backpacking guide in southeast Alaska and written for BACKPACKER, REI Co-op Journal, and The Dyrt, along with her work for Treeline Review. She’s a lifelong skier, mountain biker, backpacker, and trail runner who’s passionate about lowering barriers to entry for outdoor sports.
Stasia is both a lifelong camper and coffee snob who refuses to go anywhere without great coffee in tow. Along with her experience in the outdoor industry, she’s worked in several coffee shops and cafes, honing her barista skills and learning how to taste coffee. She’s as much a passionate foodie as she is an outdoor adventurer and can most often be found deep in the mountains with a good cup of joe.
You can see all of Stasia's stories at Treeline Review or at her website.
Sources


