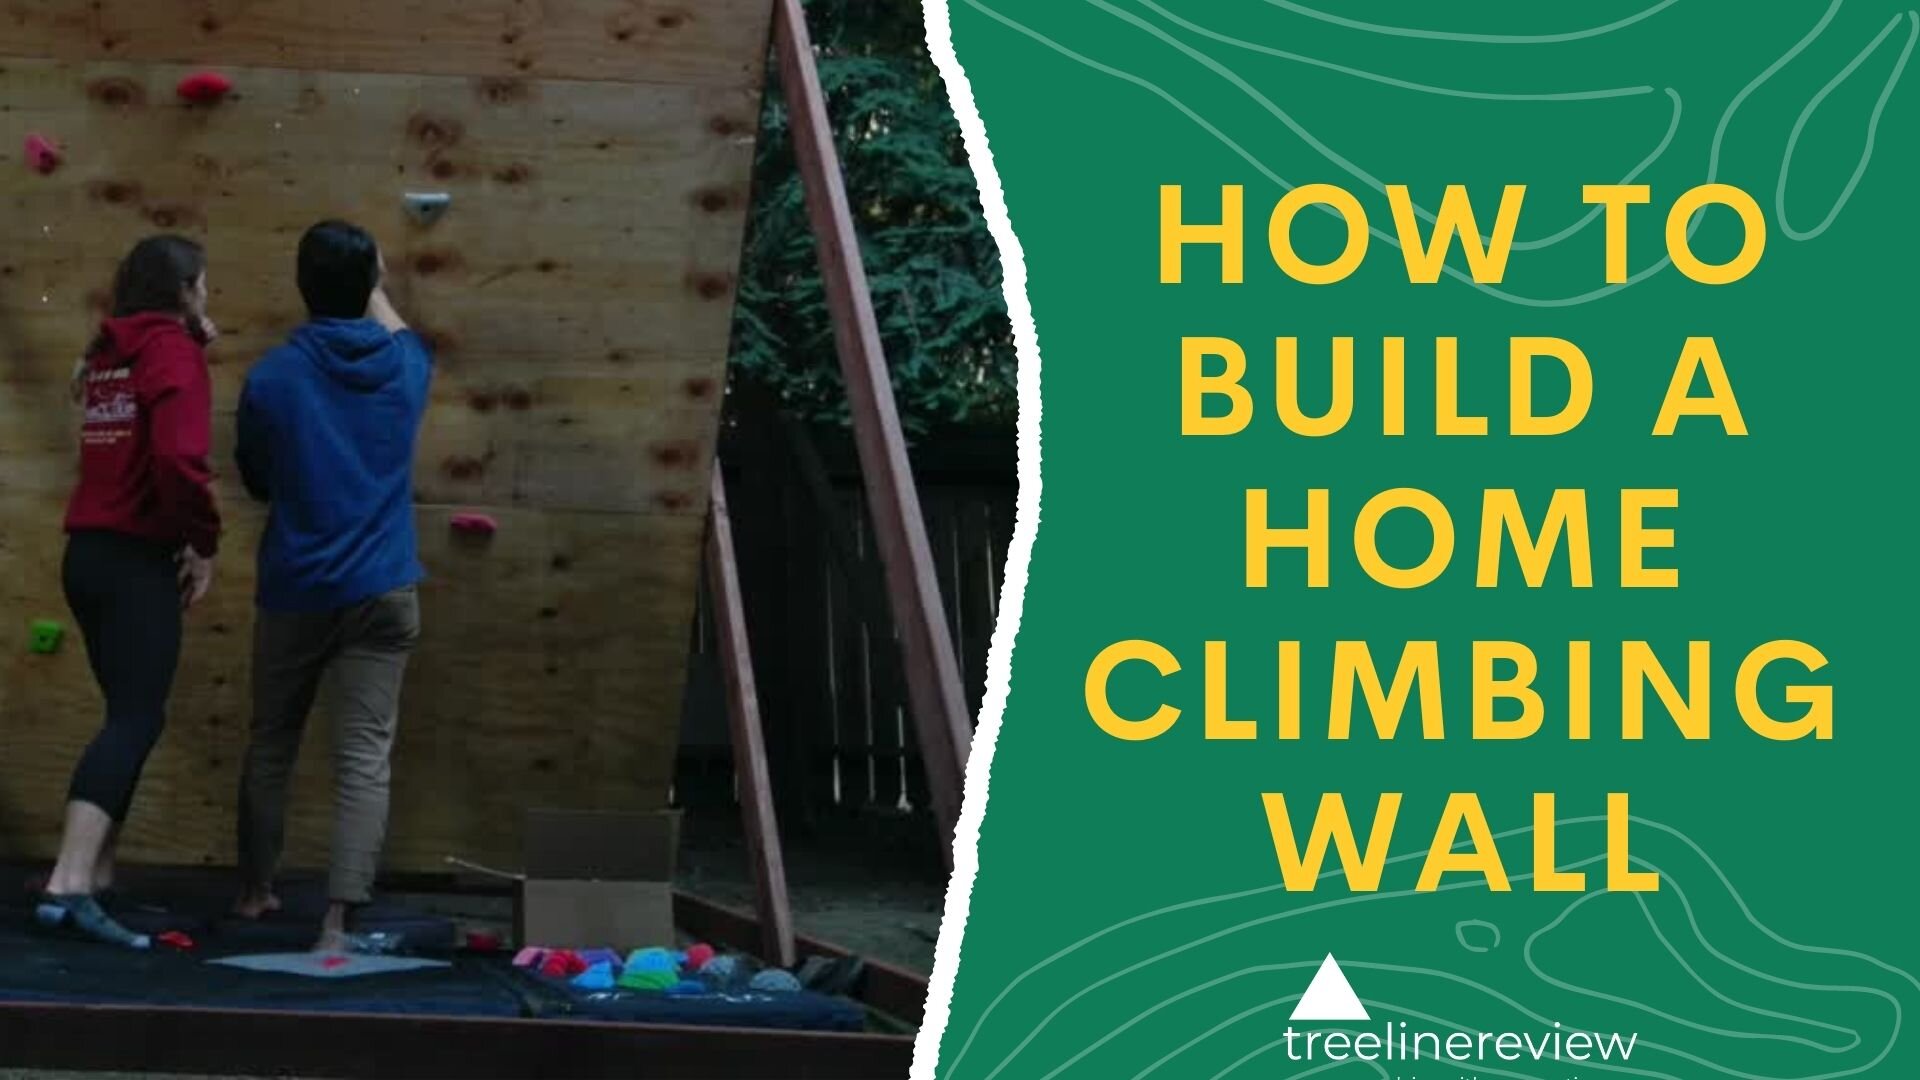
How to Build a Home Climbing Wall
12 steps to build a DO-IT-YOURSELF CLIMBING WALL
November 19th, 2024, updated for new materials and to clarify the difference in types of climbing holds
Looking for a fun way to stay active at home, a jungle gym for little ones with endless energy, or a chance to create your own personalized climbing routes? Your answer is to build your own home climbing wall! While building your own climbing wall at home is not for the faint of heart, the effort and money you put into a DIY climbing wall can be well worth it.
We are here to get you started on building your very own rock climbing wall at home! This is not intended to be a comprehensive guide, but it should bring up all the aspects you’ll need to consider before embarking on your own home wall journey. My climbing/building partner and I are not professional carpenters, but we did plenty of research before building our own backyard rock wall. Here is what we learned and what we would have done differently!
Related: Stay Adventure Ready: How to Exercise at Home (no gym required!)
We create reader-supported, objective, independently-selected gear reviews. This story may contain affiliate links, which help fund our website. When you click on the links to purchase gear, we may get a commission, without costing you an extra cent. Thank you for supporting our work and mission of outdoor coverage for every body! Learn more.
Into Climbing? See our most popular Climbing guides:
Equipment List to Build Your Own Climbing Wall
This list is a starting point for gathering equipment for a do-it-yourself climbing wall. It is not a complete list because every design calls for slightly different equipment. Depending on the design of your wall, you may need equipment not listed here, such as saws for cutting wood, brackets to secure your wall, etc. We also do not list all the types of drill bits and hardware you will need, as that will differ depending on your design.
| EQUIPMENT | EXAMPLES |
|---|---|
| Climbing Holds | |
| Metolius Mega 50 Hold Set | |
| Trango Myorcan Starter Kit | |
| So iLL Training Tiles | |
| Lumber | |
| Lumber Delivery | |
| Plywood | |
| 3/4" Plywood | |
| T-Nuts | |
| T-Nuts | |
| Ladder | |
| Ladder | |
| Colored Tape | |
| Tape | |
| Drill Bit for T-Nuts | |
| Drill Bit | |
| Adhesives | |
| Liquid Nails | |
| Hardware | |
| Screws | |
| Bolts | |
| Nails | |
| Weatherproofing | |
| Tarp | |
| Seal, Stain, Textured Paint | |
| Sealants | |
| Stain | |
| Textured Paint | |
| Drill | |
| Drill | |
| Hammer | |
| Hammer | |
| Measuring Tape | |
| Measuring Tape | |
| Level | |
| Level |

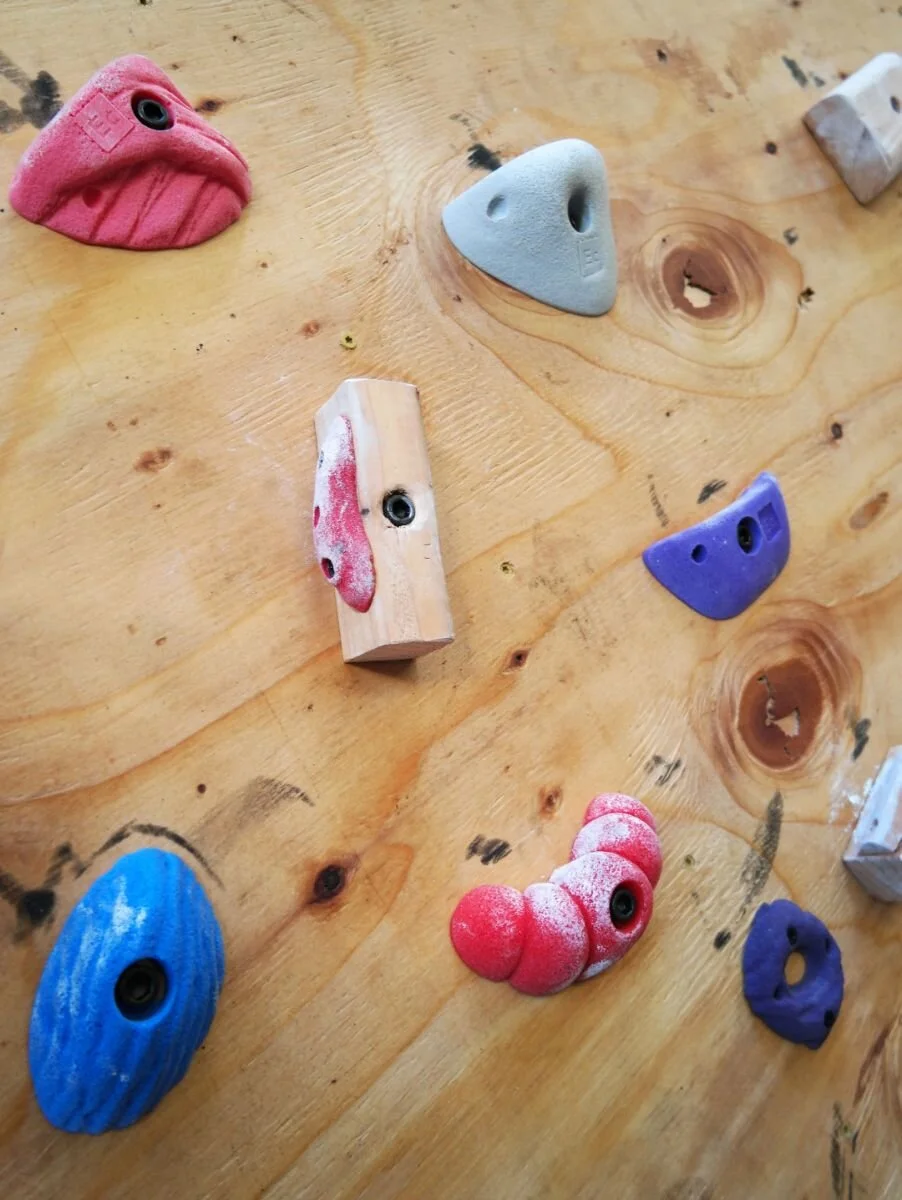
Climbing holds set on my Do-It-Yourself climbing wall. Photo by Jocelyn Crawford.
STAGE ONE: PLANNINg
Planning is the most important step in building a home climbing gym.
Physically building our bouldering wall only took two days, planning it took over a week.
Drawing out every detail of your wall can feel a bit like homework and might not be as fun as getting your hands dirty. But I strongly encourage you to spend a good chunk of time on the design and details! It truly makes the whole process easier. If you don’t know how to start the planning stage, here is how we went about it.
Research
Start by getting an idea of what is out there! The research step is a great way to start thinking about your home climbing needs before sorting out the nitty gritty. Lots of people have shared their home climbing set-ups on blogs, social media, and YouTube. No need to get details on every bouldering wall you see yet, just keep the following in mind:
“What do you like in a climbing wall? What doesn’t appeal to you? What do builders create in a space like yours?”
This should help you develop an idea of what is possible and ideal in your space, as well as what you want.
Consider what the primary use of your wall will be. For example:
kid friendly entertainment
casual home exercise
goal-oriented training tool

You’re building your home climbing wall for your use—so it’s worth taking some time to design it so that it meets your personal goals from having fun to training hard.
Evaluate how you will use your climbing wall
Once you have a general understanding of what home climbing setups exist, it’s time to evaluate your specific needs and limitations. This step is crucial to designing something useful and home-build friendly. To help you evaluate all aspects of home wall building, here are the categories we found most influential for our final design:
· Primary Use
· Angle
· Logistics
· Budget
Primary Use
Narrow down the primary use of your rock climbing wall by considering what you want to do on your home wall and what you would realistically use the most. What you plan on using the wall for will steer you towards specific features to include in your final design. Here are some examples of bouldering wall specifications that might influence elements of the final design.

Angle
One design feature everyone designing a home climbing system will have to consider is the wall angle.
Intuitively we know that a vertical wall is easier to climb on than a steep (overhung) one. But that doesn’t provide a specific answer to what angle your rock climbing wall should be set to.
To get a thorough understanding of how important wall angle is, and how to pick the best angle for your home wall, I asked the Assistant Director of Setting at Movement Climbing (formerly Planet Granite):
“Making a wall more or less steep can have a profound effect on the difficulty of the moves. This is especially true with holds that are not incut, or in other words, slopey or flat. A jug will still feel relatively good on a severely overhanging wall, but a flat climbing hold will be exponentially harder to use on an overhang versus a vertical wall.
“Most experienced boulderers I know prefer a wall in the range of 30 to 60 degrees overhanging. ”
I don’t think endurance climbing necessarily dictates a specific angle of wall, although I believe your training should always reflect the goal. If your outdoor (or indoor) projects are on steep walls, you should train on a steep angle, and vice versa.”
Here’s a handy wall angle calculator to help you make your decision. Remember your training goals and how you'll be using your DIY rock climbing wall. Angled walls may be a key element of a goal-oriented training tool or can add to the excitement of a family, friendly home bouldering gym.

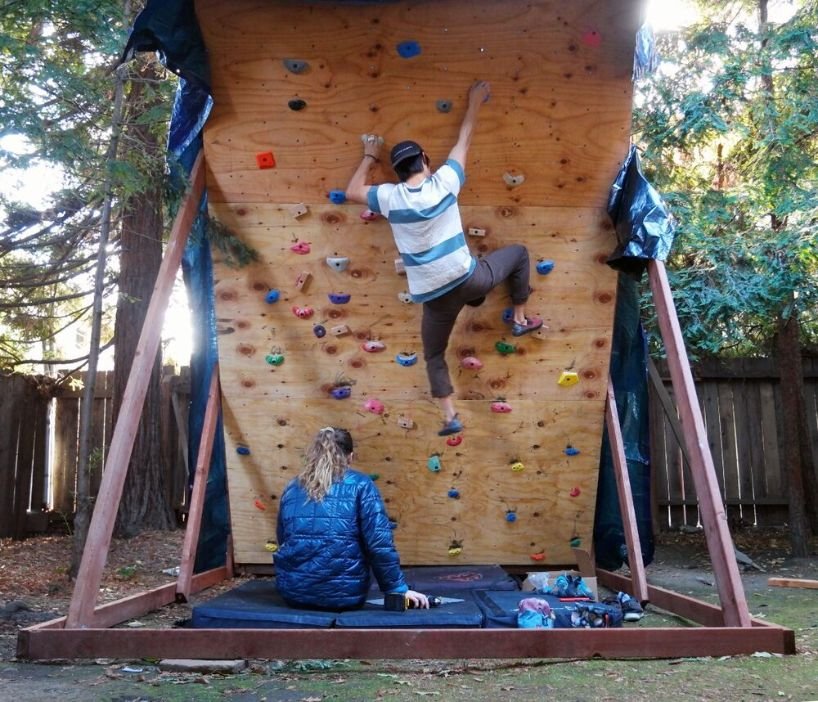
Logistics dictate design specifics of your climbing wall. Here, space was limited in the backyard due to trees. Additionally, waterproofing is required because our DIY climbing wall is outdoors instead of in a garage. Photo by Jocelyn Crawford.
Logistics
Once you have decided on wall features, three logistics will dictate many of the design specifics.
1. SPACE
Space itself can be the biggest limitation.
Your wall obviously shouldn’t be bigger (or taller!) than the space it will fill.
Decide if you’ll use any features of the space to help support the wall, or if it should be completely free-standing.
A freestanding rock climbing wall might have a frame that is larger than the wall itself, so make sure that will fit your space as well.
If the area you are building in won’t be fully dedicated to climbing, determine how you’ll transition the space, and if the wall will need to move.
Outdoor builds will have to be appropriately weather-proofed and protected from environmental factors, primarily moisture and heat.
Don’t forget about the surface your wall will be placed on! Building an indoor climbing wall (such as in a garage) generally means you’ll have a level base, but you may need to protect flooring from the frame.
If building directly onto soil, consider how that will influence the base of the wall. Uneven ground can lead to an uneven frame, and a heavy climbing wall can sink into soft soil over time. Creating a stable base for your wall may take extra steps in this case.
2. TOOLS
Tools can be another major limiting factor. What tools you have access to, and feel comfortable using, dictate what you can do yourself.
One way around this is modifying your design. When building our wall, we excluded any wood pieces with precise angles since we did not have the tools to make exact cuts.
Another option is recruiting help. Friends and family can be a great resource for not only tools but general building advice.
Local tool lending or renting programs are also an option if available in your area. Some suppliers will cut lumber for you, but this will require you to have a precise design and list of lumber with measurements when ordering.
3. PHYSICAL BUILDING ABILITY
An easily overlooked limitation is physical building ability. This does not just mean your carpentry knowledge. It literally asks ‘will you physically be able to build the wall?’
Moving large pieces of lumber can be exhausting, not to mention requires a large vehicle.
Will you be able to purchase and bring home all your building materials or do you need to have lumber delivered?
And what about once the wall is built? An 8-foot x 12-foot wall can be surprisingly heavy.
Building the whole wall on the ground means you’ll have to lift it up to the raised wall position. Putting the frame together in an upright position is an option but takes careful planning beforehand.
Our design intentionally added legs that could be used to raise the wall so we could erect it with only 2 people. But it was still very difficult to move just part of the wall once it was built.
Another example of physical ability we forgot to consider was how we would set routes on the upper part of the wall. Without a ladder, we had to get creative to reach the upper section of the wall.
Considering how you’ll carry out all the tasks you’ve planned will help them go smoothly!
Budget
Building a home climbing wall will be a pretty big project, so before you dive in, evaluate how much you are willing and able to spend. Also, consider how much is a “deal breaker.”
Depending on how much you will use your wall, a larger investment could be worth it.
If you’re not planning on using your setup frequently, a scaled-down and less expensive design might be a better option.
Once the design is finalized, you’ll have an exact budget. But sketching out a general idea of what you’ll need can provide an initial concept of how much you’ll likely be spending (and if the project is worth it to you).
When budgeting, include the cost of materials but don’t forget all the additional expenses. Tools, shipping, lumber delivery, and even waterproofing supplies like a tarp, can add up. Be sure to factor all these into your budget.
You may have the necessary tools but find that you will need specific add-ons. For example, we needed to purchase a specific drill bit compatible with t-nut anchors that wasn’t included in the standard drill bit kit we had.
Design
Once you’ve done some research and evaluated your needs, you should be prepared to create a full plan for your wall!
Sketch out your design. Include specific details like dimensions and pieces of hardware.
Before finalizing the design, go through the process of building it on paper. Answer the following:
What should you start?
In what order will things come together?
How will all the pieces connect?
Have you included all the necessary tools?
The following sections will cover some specifics of wall design to help you get started.

The raw materials to make a home climbing wall.
Lumber
Lumber and plywood are a great place to start working on design specifics if you’re feeling lost.
1. LUMBER AND PLYWOOD DIMENSIONS
Both lumber and plywood are typically available in standard sizes. You can use these dimensions as the basis for your wall design to simplify building. This will also reduce how much lumber you’ll need to buy and cut.
Remember that literal lumber dimensions differ slightly from what the naming convention suggests. A “2 by 4” is not exactly 2 inches by 4 inches. This will only cause a problem if you have a design requiring very precise measurements but is good to be aware of.
Here is an article that provides a great overview of lumber quality, grades, and dimensions. Also, if you are using dimensions other than commonly available ones, remember it might alter your wall’s structure and budget!
2. TREATED VS. UNTREATED LUMBER
Another design decision you’ll have to make is whether to buy treated or untreated lumber.
Treated lumber can be an attractive option since it requires no further weatherproofing. But much pressure-treated lumber is soaked with harsh chemicals that may have adverse effects on nearby plants or pets.
If available, naturally rot-resistant woods (like redwood and cedar) are a less toxic alternative. Sealing untreated lumber like pine is another way to avoid using pressure-treated lumber for your wall structure.
Wall Material
You’ll also have to decide which material to use for the surface of your wall.
DIY building guides sometimes suggest oriented strand boards (OSB) because they are a cheaper alternative to plywood. However, OSB is heavier, more flexible, and more sensitive to moisture than plywood panels. This plywood sheet is used more often for climbing walls.

Hardware and tools we used to make a home climbing wall.
Plywood comes in a variety of grades which will affect the appearance, strength, and price of the wood.
Keep in mind that large knots or voids in the wood increase the risk of ripping a bolt anchor through the wall.
Regardless of which grade you select, use ¾” thick sheeting. This size is the thinnest, lightest, and cheapest sheeting that is still strong enough for a home bouldering wall. We’ve climbed on our ¾” wall for several months with no issues! This size is also used by US climbing hold manufacturers as the basis for t-nut and bolt lengths.
Hardware
When designing your wall, include hardware in your plans. Where will you be using screws, bolts, or nails? Here is a quick guide to different types of fasteners, but when in doubt ask for help from carpentry savvy friends or hardware store professionals.
Consider adhesives, like liquid nails to attach wall pieces together, as they can reduce how much hardware is needed, and increase the longevity of your wall (especially if it’ll be exposed to moisture).
Liquid adhesives may not work with your design if it has an adjustable angle or moving parts.
If you are using adhesives on the wall itself, avoid threads on t-nuts as this can render them unusable.
To ensure you create a thorough material list, double check that you’ve thought through how all pieces will fit together, be supported, and secured.
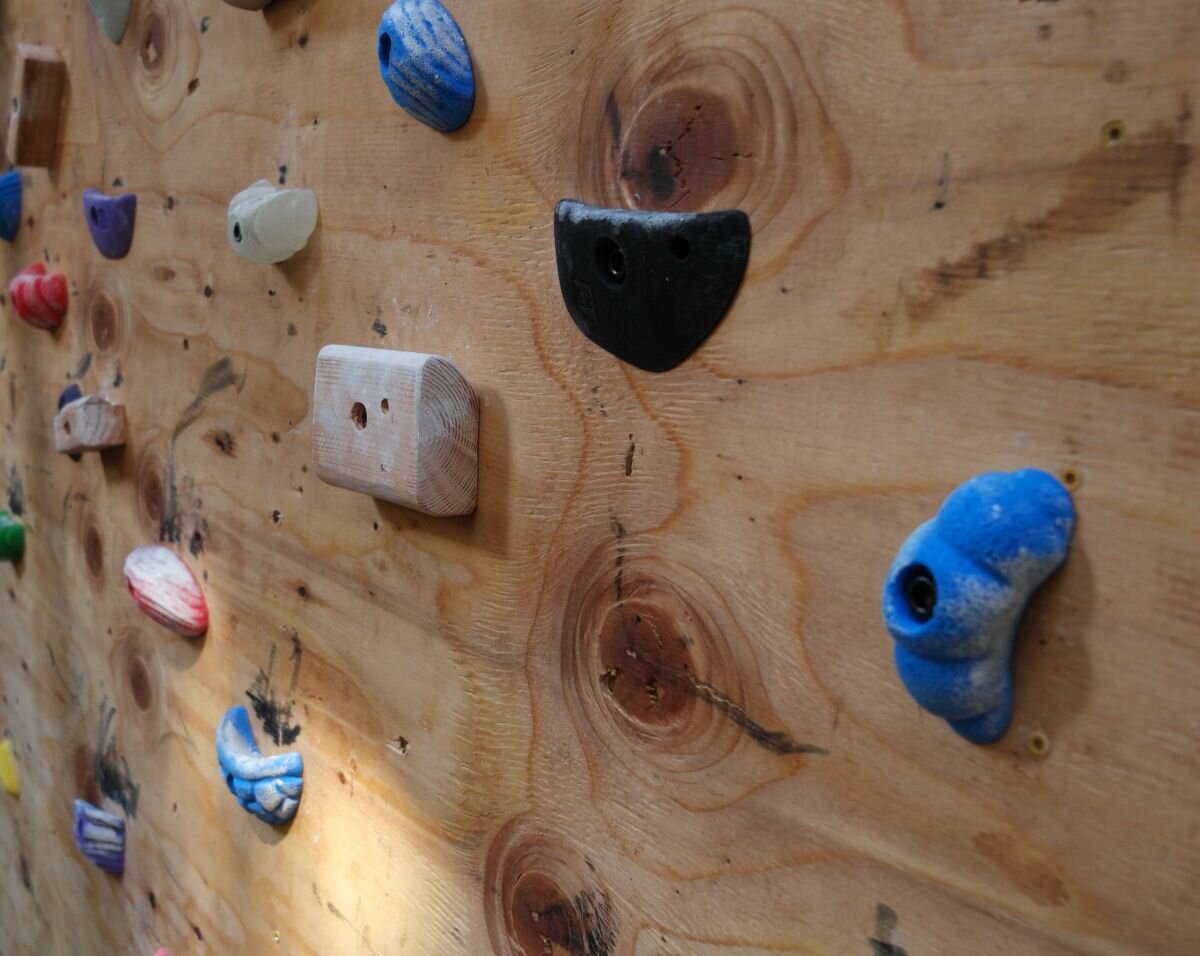
Close up of the climbing walls attached to our wall.
Climbing Holds
You’ll need to plan how holds will be added to your wall. Many brands such as Metolius, Trango, and So iLL sell climbing holds as kits. We get more into holds based on your level of climbing below. But for the purposes of the planning phase, for this section, we focus on the different types of holds in terms of their installation: screw-on vs. bolt-on holds.
1. SCREW-ON HOLDS
Screw-on holds are generally cheaper but shouldn’t be changed regularly since they require drilling through both the climbing hold and wall. However, one benefit of screw-ons is they require a little less pre-planning since they can be screwed onto the wall essentially anywhere.
2. BOLT-ON HOLDS
Bolt-on holds are a bit more expensive, but can be changed as many times as needed. The hold is secured with a bolt that screws through a threaded t-nut anchor in the wooden wall. Preplan a bolting pattern and install t-nuts after cutting your plywood sheets to size but before installing them in a frame.
VIEW CLIMBING HOLD KITS
Weatherproofing
You should also consider weatherproofing measures during the design phase of your build. If you are building an indoor climbing wall in your garage, you'll need different weatherproofing than if your wall is in the backyard.
Think about any pieces of wood that might need to be sealed, and if any additional elements are needed. Can you just throw a tarp over it? Or will your backyard climbing wall need more substantial shelter?
Again, it’s all about thinking through the small details before you get building.

With good planning, we were able to build a home climbing from raw materials to a climbable wall in 2 days.
STAGE TWO: PHYSICAL PREPARATION + BUILDING
Materials: Lumber, Hardware, Holds
Once you have a thorough design and game plan, get those materials!
Using your materials and tools list, you can start exploring the most cost-effective places to get everything you need. Below are some tips from my own experience!
Lumber
Request a quote from your local lumberyards. Quotes are free and delivery can be cheaper than major home improvement chains depending on your area.
In our case, Lowe’s was the cheapest option, but it was not the best. The Lowe’s, online ordering (even for instore pickup), did not work well. Because of the slow online stocking system, we were told our order was fulfilled when in reality, the store did not have some pieces of lumber available. Long story short, we ended up driving to a location further from us with slightly better stock and picking our lumber pieces from the in-store selection. While we got what we needed in the end, it was time-consuming and meant we spent more money and time than we were originally planning.
Check local suppliers to get your order fulfilled faster, possibly for less money, and to avoid order coordination issues. If you opt to pick up lumber from a larger retailer, CALL FIRST! The online systems do not always update quickly, and you might find yourself out of luck when you show up for your materials.
Hardware
For most of the hardware that you’ll need for a home bouldering wall, a local hardware store or chain should be able to cover it. You can compare prices between stores in your area for the best deal possible, though there may not be a significant difference.
The one piece of hardware you should NOT get from a home improvement store or a climbing hold supplier is t-nuts (if your wall requires them). Bulk orders on Amazon are almost always a far better deal! Make sure to get the correct size t-nut for the holds you plan on using (double check with your hold manufacturer, but the standard is 3/8 -16).

A wall of foot chip climbing holds on our home climbing wall. Photo by Jocelyn Crawford.
Holds
Climbing holds can be shockingly expensive! If possible, check with climbing gyms near you if they sell or “donate” their old holds. The gyms in our area had a policy against this, so for us, the cheapest option was “factory seconds” or bulk/clearance holds. These are holds with minor defects that are sold at a huge discount.
We purchased factory seconds in bulk from two different manufacturers. Atomik Climbing Holds don’t always offer bulk factory seconds, but they have some great deals depending on when you shop. Element Climbing is a more consistent source for bulk and clearance holds.
Many hold companies sell at outdoor retail stores like REI, Backcountry, and Moosejaw as well. Climbing brands such as Metolius and Trango sell starter kits available in 10 to 60 packs.
Overall, we were very satisfied with the holds we received, and ordering from two companies meant we got a wider variety of holds. Sometimes it’s possible to request specific hold types you prefer in a factory seconds order, but there’s no guarantee what you’ll get. Here’s a quick refresher on indoor climbing hold types and how they are used.
So if you have specific needs, you may need to supplement your hold supply with standard commercial holds. This article suggests some kits to get you started and offers more advice on selecting commercial holds.
Although our wall is primarily bolt-on holds, we added screw-on foot chips from a bulk pack so we didn’t need as many bolt-on holds (which are usually not foot chip-sized, and pretty expensive to use for an entire kickboard or lower board section).
If you’re looking for the most inexpensive holds, and have the time and interest, making your own holds is also an option. We added a few homemade wooden holds to our wall but did not rely on these to fill the whole thing out since we lacked the skills to make a wide variety of wooden holds.
VIEW CLIMBING HOLD KITS
The author climbing on the DIY home climbing wall.
Steps to Build Your Own Home Climbing Wall
After all that preparation, it’s finally time to build! With thorough planning, the building itself can be quick! After a week and a half of planning, we got our wall up in less than two days.
If you want to seal, stain, or use textured paint on any of your pieces before assembling your wall, read the directions on your paint or sealant. It might be a good idea to apply them to your materials before your big building days since some types of pants or sealants need a few days to dry completely.
Check the weather forecast if you plan on doing any of your building outside, including overnight. If you’ll need to leave something out overnight, you don’t want to find it soaked in the morning.
Steps to Build
If you feel overwhelmed when it’s finally time to assemble your wall, create a step-by-step list of tasks. Obviously, your building steps and order will probably not be identical to ours but here is the order in which we built our wall (not necessarily a recommendation, but just gives you an idea):
1. Move/gather supplies
2. Sand and stain plywood
3. Build outer wall frame, including vertical supports
4. Drill holes into plywood for each bolt
5. Hammer in T-nuts
6. Cut and attach horizontal frame support pieces, using actual plywood for sizing
7. Connect plywood to frame and secure all supports
8. Build frame legs
9. Move wall to the designated spot
10. Bolt legs on in position
11. Raise and secure frame
12. Add holds
13. Secure waterproofing tarp
Our Experience
I mentioned we got our wall up in less than 2 days. While this was in part due to thorough planning, it did require focused hard work to make it happen so quickly. With only 2 people working on the wall, the work was very physically demanding as well. We knew we could do it and were motivated to finish quickly, but this approach might not be for everyone.
Even with thorough planning, we still hit some obstacles that could have been avoided. Probably because we were working so quickly, we used the wrong size drill bit for all the t-nut holes and had to go back over each hole to correct the mistake.
Another issue we worked through was warped lumber. Pressure-treated lumber fit our needs based on what was available in our area, the ground contact of our frame, and how much moisture the wall would be exposed to in a backyard with dense tree cover. However, pressure-treated lumber has a high moisture content and is prone to warping.
To work around this, we created our frame and then added horizontal supports measured to the exact pieces of plywood we added. Functionally this was fine but is an example of something we might have done differently in hindsight.
Even with extensive planning (which I highly recommend), you will likely still hit issues.
After completing a home wall, here is what we learned:
Don’t panic and be ready to problem-solve. There is probably a simple solution to a situation you didn’t anticipate.
Think through everything and don’t rush
Double-check everything and make sure your building team understands the plan! This will help you check in with each other that things are progressing smoothly.
Easy questions to ask yourself when in doubt: Does what we are doing make sense with our design? Is everything supported?
STAGE THREE: SETTING CLIMBING HOLDS
This stage is the most difficult to create a generalized guide for since everyone’s specific needs dictate how to set on your personal wall. As I am not a professional route setter, most of the following advice comes from Cody Hanson, Assistant Director of Setting of Movement Climbing Gym (formerly Planet Granite) in San Francisco. The general principle he suggested home wall setters keep in mind is this:
“Remember that the wall is specifically for you. ”
“In the climbing gym, we try to make our climbs diverse and inclusive to climbers of many different sizes and skill levels. For your own wall, prioritize your own personal strengths and weaknesses you want to train. Try not to make everything too within your comfort zone and remember that the climbs should be for your own benefit.”
Most climbers like a wall with a variety of holds to practice.
For the Casual Climber or Family Wall
If your wall will be used for fun with friends or family, you’ll want accessible climbs to get everyone on the home climbing gym. Multiple routes will also prevent climbers, especially younger children, from getting bored.
To do this, set the holds so that moving from one to the next is within your comfort zone. Plenty of large handholds and footholds make the climb easier, so be generous.
In order to fit plenty of routes on the wall, consider keeping the routes close together or even using individual holds for multiple routes. Often commercial climbing gyms will use holds of one color to identify routes.
If you want to use holds for multiple routes or change entire climbs with minimal work, tape is your best friend. Tape of various colors can be used to identify routes, and easily altered.
For the Intermediate Climber
If you want your wall to push you to develop your climbing, you’ll want some routes that are challenging, but not frustratingly difficult at your current skill level.
To create a climb just at or slightly above your maximum ability, Cody suggests making “every individual move as close to your limit as possible.”
Alternatively, set a route within your comfort zone, “then simply make all of the holds a bit worse.”
Setting climbs that are the “correct” difficulty to push yourself can be “one of the hardest things to do without a bit of experience, and a bit of confidence and trust in your own judgment,” says Cody.
Be patient with a bit of trial and error while you learn how to set at such a specific level.
For the Spray Wall Climber
A spray (or chaos) wall is a popular training tool and allows you to make up routes in the moment. A spray wall is a great way to maximize the potential climbs on your home wall; however, it can be overwhelming to set a wall full of climbing holds.
One way to go about it is by setting a few boulder problems, then filling in the wall with remaining holds. Cody recommends prioritizing a “variety of holds within a small grid, to give yourself lots of options.”
When in doubt about selecting holds, “mix up the angle, size, and grip type.” Screw-on foot chips are also an inexpensive option to fill in a spray wall, especially on the lower third of the board where your feet will start and stay when traversing.
For the Advanced Climber
The more developed your climbing ability and goals become, the more you’ll need to tailor your wall setting. Coaches, professional setters, and other accomplished climbers are valuable resources for creating personalized and advanced training tools. This article also has some creative suggestions for setting and training on a home wall.
Conclusion: Use your Wall!
Now comes the best part, climbing on your wall! Remember there isn’t any gym staff looking out for you. It’s up to you to stay safe when climbing at home. Use your best judgment and have fun!
For added safety, consider placing a bouldering crash pad under your wall to help cushion unexpected falls.

Why you should trust us
Jocelyn Crawford is a climbing devotee originally from Seattle and currently based in San Francisco. She holds a B.A. from Claremont McKenna College in Biochemistry and enjoys combining her background in research and college athletics to evaluate gear, climbing destinations, and training methods.
In 2020, Jocelyn Crawford built her own climbing wall. As part of the process, she interviewed numerous professional route setters and climbing wall builders.
You can read more on her author page.


