How to Prep for a Snowshoeing Trip: A Comprehensive Guide
Tips on snowshoeing basics, techniques, choosing the best gear, and how to plan a safe and fun trip

February 11, 2025
Home | Gear Reviews | Ski & Snow Gear
When I tell people I go snowshoeing, I usually get three reactions:
1. "Isn't that just walking in snow?" (kind of, but way more fun);
2. "Don't you need special training?" (nope—if you can walk, you can snowshoe); and
3. "Isn't it freezing?" (sometimes, but that's what layers are for!)
Snowshoeing is basically hiking, but with snow. Instead of sweating it out on dusty trails in the summer heat, you're crunching through fresh powder with these weird-looking tennis rackets strapped to your feet. And let me tell you—there's nothing quite like being the first person to break trail after a fresh snowfall. The whole forest goes quiet, everything's covered in white, and you feel like you've stepped into some kind of winter fairy tale.
And while snowshoeing itself is pretty straightforward, you DO need to know how to prepare. I learned this the hard way my first time out, when I showed up wearing cotton socks (rookie mistake) and didn't bring enough snacks (always a mistake). The winter wilderness doesn't care if you're new at this. So before you head out, let's talk about how to get ready.
Consider the 10 essentials, layers, and then some. A little prep work makes the difference between "this is amazing!" and "why did I think this was a good idea?"
We write mission-driven gear reviews. To find the best gear, we combine expert reviews, everyday user opinions, and rigorous independent trail testing—never pop-up or display ads. We are reader-supported and may make a small commission from some qualifying affiliate links. Learn more.
Snowshoeing gear list
| GEAR CATEGORY | WHAT TO PACK |
|---|---|
| ESSENTIAL GEAR | |
| Snowshoes | |
| Trekking poles | |
| CLOTHING | |
| Base layer top |
Understanding snowshoe basics
Choosing the right snowshoes is essential. While we won't dive into specific recommendations here (check out our Best Snowshoes guide for that), understanding the basics of snowshoe design and function will help you make an informed choice. Snowshoes come in a variety of styles and sizes, each tailored to specific terrain and snow conditions.
Start by thinking about the type of terrain you'll encounter. Flat terrain snowshoes are beginner-friendly and ideal for groomed trails. They feature straightforward bindings and basic traction, making them comfortable and easy to use on packed snow. Rolling terrain snowshoes offer more grip and secure bindings, perfect for moderate hills and off-trail exploration. If you’re heading into steep, icy, or backcountry conditions, mountain terrain snowshoes are the go-to. They’re equipped with advanced bindings, aggressive crampons for traction, and often a heel lift for steep ascents.

When choosing snowshoes, it’s important to consider the terrain you’ll be traversing and the additional weight of your gear.
Snowshoe size is just as important as the type. The heavier you (and your gear) are, the larger your snowshoes need to be to provide sufficient flotation. Larger snowshoes spread your weight over a greater surface area, helping you stay on top of deep snow. That said, going too large can make maneuvering on packed trails or in tight spots cumbersome, so aim for a size that matches your weight and activity level.
Don't underestimate the weight of your winter gear when figuring your total weight. Also important is to check the size of your winter hiking boots or shoes to make sure they fit or adjust to work with whatever snowshoes you are considering.
Finally, consider the snow conditions. Deep, powdery snow requires bigger snowshoes to keep you afloat, while icy or packed trails call for smaller, more agile options. There are even running-specific snowshoes on the market for those who like to snowshoe run or even enter a snowshoe race! If you expect a mix of conditions, look for versatile, mid-sized snowshoes that can handle a bit of everything.
Snowshoeing layers
Layering is the cornerstone of staying comfortable during a high-output activity in winter. Your goal is to strike a balance between staying warm and managing moisture—no small feat in winter conditions. Here's a breakdown of the ideal layering system, starting with the essentials closest to your skin.
Base layer
The base layer is your foundation, responsible for wicking sweat away from your skin to keep you dry. Moisture management is crucial because wet fabric can quickly lead to chilling. Merino wool is a favorite for its ability to wick moisture, resist odors naturally, and regulate temperature. It’s soft against the skin and retains warmth even when damp.
Synthetics like polyester blends are also solid choices—they dry quickly and stand up to rugged use.
Never wear cotton or cotton blends—it holds onto moisture and offers no insulation when wet, which can lead to serious heat loss.
Learn more in our Best Base Layers guide.
Midlayer
The midlayer provides insulation by trapping warm air close to your body. Fleece is a versatile option, offering lightweight warmth and breathability. It's available in a range of weights, so you can tailor your choice to the day's conditions. Wool sweaters are another option, delivering excellent insulation even when damp, though they tend to be heavier.
For more frigid temperatures or slower-paced outings, a puffy jacket with down or synthetic fill adds a serious warmth boost. Down is unmatched for its warmth-to-weight ratio but falters when wet. Synthetic insulation is slightly bulkier but keeps you warm even in damp conditions, making it a reliable alternative and good for winter travel.
For jacket recommendations, check out our guides on Best Down Jackets and Best Synthetic Insulated Jackets.

Layers that keep you warm and dry, without overheating, will help ensure a safe and fun snowshoe trip.
Outer layer
Your outer layer is your barrier against snow, wind, and unpredictable weather. Look for a waterproof, breathable shell made from materials like Gore-Tex or similar membranes. These fabrics keep out moisture while allowing sweat to escape.
Prioritize features like pit zips for ventilation, a hood that fits over a hat or helmet, and adjustable cuffs and hems to lock out cold drafts. Your shell should fit comfortably over your other layers without limiting movement.
For some of our favorites, check out our Best Softshell Jackets, Best Men’s Ski Jackets, and Best Women’s Ski Jackets guides. For more breathable options for faster snowshoeing excursions, check out our Best Men’s Running Jackets and Best Women’s Running Jackets guides.
Hat and gloves
Don’t neglect your extremities. A warm hat that covers your ears is essential since you lose a lot of heat through your head. Winter gloves or mittens should match the temperature and activity level. Mittens are warmer but limit dexterity, while gloves offer better mobility for tasks like adjusting bindings. For extra versatility in cold conditions, consider a glove layering system: liner gloves under a waterproof shell mitten. This setup lets you handle finer tasks without fully exposing your hands to the cold.
For more, check out our Best Winter Gloves guide.
Socks
Proper socks are key to keeping your feet warm and comfortable. Wool or synthetic blends are the go-to for their moisture-wicking and insulating properties. Always pack an extra pair—switching to dry socks mid-hike can make a world of difference for comfort and blister prevention.
You can find some of our favorite socks in our Best Ski Socks, Best Hiking Socks, and Best Waterproof Socks guides.
Best pants for snowshoeing
Having the right pants is critical for staying warm, dry, and comfortable during your snowshoeing trip. Here’s some things to keep in mind when selecting snowshoeing pants.
Waterproof or water-resistant pants
Snowshoeing means constant contact with snow, so your pants need to fend off moisture and wind. Look for options with waterproof membranes like Gore-Tex, which offer reliable weather protection without compromising breathability. For less extreme conditions, water-resistant softshell pants can work well, providing flexibility and comfort while still shedding light snow.
Insulation
The level of insulation you need depends on the conditions and your activity level:
Insulated pants: These are ideal for very cold weather but can cause overheating in mild temperatures or during intense activity. Lightly insulated pants strike a good balance when layered properly.
Non-insulated pants: A better choice for milder conditions or when using a layering system. Shell pants without insulation let you adjust warmth with your base and mid-layers, giving you more control.
Breathability and ventilation
Snowshoeing is physically demanding, so overheating can be a real concern. Pants with good breathability and features like side vents or zippers help regulate temperature by letting excess heat escape when you're working hard.
Durability
Winter environments can be tough on gear. Look for pants made from durable materials like ripstop fabrics that can handle the rigors of snowshoeing. Reinforced knees and seat areas add extra protection, especially if you find yourself kneeling or sitting in the snow.
Integrated gaiters or snow cuffs
Built-in gaiters or snow cuffs are a game-changer for keeping snow out of your boots. These features create a seal around your ankles, so you stay dry even when trekking through deep powder. Many snowshoeing and ski pants include this design, and they’re worth prioritizing. If your favorite winter pants don’t have this feature, you can always add a pair of gaiters for extra waterproofing and to keep out snow.
The right pants will keep you comfortable without holding you back, letting you focus on enjoying the snow instead of worrying about the elements. For more suggestions, check out our What to Wear Winter Hiking guide.
Choosing the right footwear
Your boots are the foundation of a successful snowshoeing trip. The right pair will keep your feet warm, dry, and comfortable, while also working seamlessly with your snowshoe bindings. Here’s what to consider when selecting snowshoeing footwear.

A good pair of winter hiking boots that are insulated, durable, and waterproof are great for snowshoeing.
Insulation
Warmth should be a top priority. Boots rated for below-freezing temperatures, often featuring insulation like Thinsulate or PrimaLoft, are a good starting point. The level of insulation you need depends on the conditions and your tolerance for the cold. For milder winter outings, 200-400 grams of insulation is typically enough. If you’re heading into frigid conditions, consider boots with 400-800 grams or more.
Waterproofing
Snow means moisture, and wet feet can quickly ruin your day—or worse, lead to frostbite. Look for boots with waterproof membranes like Gore-Tex or similar proprietary technologies. These materials keep water out while allowing your feet to breathe, which helps manage sweat buildup inside the boots.
The height of the boot matters
Mid- to high-cut boots provide better ankle support and help keep snow from sneaking in. Some boots even come with built-in gaiters or adjustable cuffs.
Ensure compatibility with snowshoe bindings
Most modern snowshoes are designed to accommodate a wide range of boot sizes and styles, but it’s worth double-checking. Your boots should fit snugly in the bindings without creating pressure points. A secure fit will keep your snowshoeing experience hassle-free.
Test your fit with the right socks
When trying on boots, wear the same socks you plan to use while snowshoeing. Your toes should have enough room to wiggle but not so much space that your foot slides around. Don’t forget to simulate a downhill stance—your toes shouldn’t jam against the front of the boot when descending.
Break them in before hitting the trail
Even if modern boots require less breaking in than older styles, it’s still smart to wear them around the house or on short walks. This helps ensure comfort and reveals any potential issues like pressure points or hot spots before you’re far from help.
For specific recommendations, check out our guides on the Best Winter Hiking Boots, Best Men's Winter Boots and Best Women's Winter Boots. Proper footwear will keep your feet happy, allowing you to enjoy every step of your snowshoeing adventure.
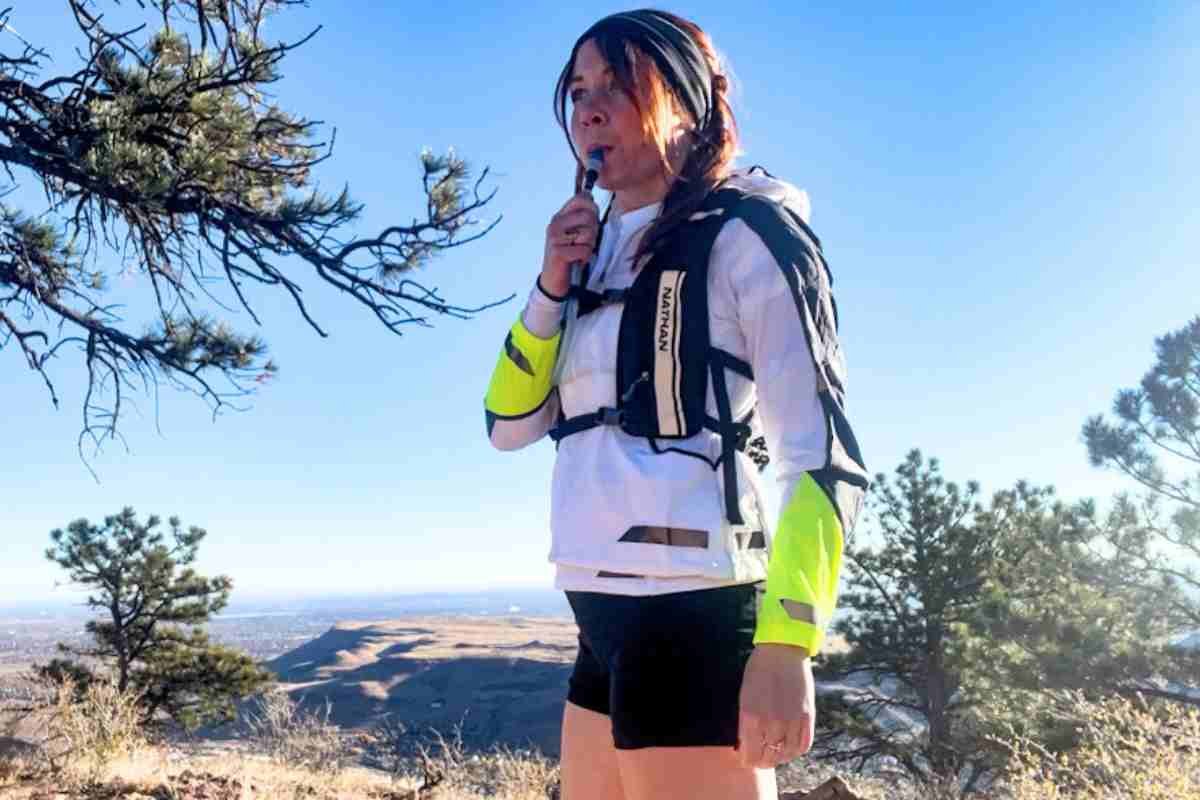
Essential Snowshoeing Accessories
Snowshoes might take center stage, but the right supporting gear ensures your adventure is not only enjoyable but also safe. Here’s a closer look at the must-have accessories for a successful outing.
Trekking poles
Trekking poles are invaluable for maintaining balance and stability, particularly on uneven or steep terrain. They take pressure off your knees and help distribute effort, which is especially welcome during long climbs or descents.
For snowshoeing, poles with snow baskets are essential — the wide discs near the tips keep them from plunging too deep into the snow. Adjustable poles let you fine-tune their length for uphill, downhill, and flat sections, while ergonomic grips and wrist straps improve comfort during extended use. Find our top picks in our Best Trekking Poles guide.

Trekking poles with snow baskets help you maintain balance and stability while snowshoeing.
Navigation tools
Winter landscapes transform familiar trails into unfamiliar terrain, so reliable navigation tools are a must. Always carry a physical map and compass, and make sure you know how to use them. GPS devices and smartphone apps are helpful but come with limitations like battery drain in cold temperatures. Dedicated GPS units with replaceable batteries are often a better choice for backcountry winter trips.
If you use your phone, protect it from the cold by keeping it in an inside pocket or even an insulated phone sleeve, and bring a portable charger as a backup. For remote areas where cell service is unreliable, consider a satellite messenger or personal locator beacon (PLB). These devices let you send emergency signals or communicate with loved ones, offering extra peace of mind.
Learn more in our Best Satellite Messengers and Personal Locator Beacons guide.
Emergency kit
Winter-specific emergencies require a tailored kit. In addition to standard first aid supplies, include hand warmers, an emergency blanket or bivy sack, and fire-starting tools in a waterproof container. A basic repair kit with duct tape, zip ties, and a multi-tool can help fix unexpected gear failures. Carry a headlamp with spare batteries—short winter days mean you could easily end up traveling after dark.
Learn how to organize your own Outdoor Items for an Emergency Preparedness Kit.
Sun protection
Winter sun can be surprisingly intense, with snow reflecting up to 80% of UV radiation. Sunglasses or goggles with 100% UV protection are non-negotiable, and wraparound designs provide the best coverage. Don’t skip sunscreen—choose a broad-spectrum SPF 30 or higher for all exposed skin, including under your chin and around your ears, which are often missed but catch reflected light. Lip balm with SPF is also a must.
For our suggestions, check out our Best Face Sunscreen, Best Sunscreen for your Body, Best Running Sunglasses, and Best Ski and Snowboard Goggles guides.
Avalanche gear
If your snowshoeing plans include avalanche terrain, safety gear is critical. This means carrying an avalanche beacon, probe, and shovel—but owning the tools isn’t enough. You also need the skills to use them and an understanding of avalanche conditions. In addition to checking out our Avalanche Gear Checklist, consider taking an avalanche safety course to prepare for backcountry travel.
Properly equipped, you’ll be ready to tackle the challenges of snowshoeing while staying safe and comfortable. Each of these accessories adds an important layer of security and enjoyment to your day in the snow.
Nutrition and hydration tips for snowshoeing
Snowshoeing demands a surprising amount of energy, burning up to 600 calories an hour for an average adult. Staying fueled and hydrated isn’t just about performance—it’s critical for keeping warm and preventing fatigue in cold conditions.
Pre-snowshoe nutrition
Start your day with a hearty breakfast rich in protein to give your body an energy reserve to draw from as you start moving. Instead of planning for a big midday meal, focus on snacking regularly while on the trail. Eating small amounts every hour keeps your energy levels steady and helps your body maintain heat production—a crucial factor in winter adventures.
On-trail snacking
Trail snacks should be easy to eat with gloves on and resistant to freezing. A classic trail mix—combining nuts, dried fruits, and chocolate—balances fats, carbs, and proteins for sustained energy. Opt for energy bars that stay soft in cold temperatures, and supplement with nutrient-dense items like nut butter packets, cheese, or jerky.
For longer outings, bringing a small stove can make all the difference. Heating water for tea, soup, oatmeal, or dehydrated meals not only fuels your body but also boosts morale on a chilly day. Taking the time to prepare and eat hot food encourages a much-needed rest, preventing exhaustion and helping you warm up.
For quick energy, read about our favorite energy gels and chews. For longer snowshoeing trips, consider our favorite freeze-dried backpacking meals.
Staying hydrated in the cold
Hydration often takes a backseat in winter, but it’s just as essential as in summer. Cold air accelerates moisture loss through breathing, and dehydration increases the risk of hypothermia and frostbite.
To prevent water from freezing, use insulated bottles and consider filling them with hot water or tea before setting out. Wide-mouth bottles are less likely to freeze at the opening than narrow ones. If you use a hydration system, insulate the tube and mouthpiece, and blow the water back into the reservoir after every sip to keep it from freezing.
Avoid caffeine and alcohol while on the trail, as both can contribute to dehydration. Save that celebratory hot cocoa—or something stronger—for the post-snowshoe glow back at the trailhead.
Proper fueling and hydration keep you energized and focused, allowing you to enjoy the experience without worrying about bonking or running out of steam in the cold.
For more, check out our Hydration Tips for Trail Runners guide and our Best Electrolyte Powders guide.
Planning your snowshoeing route
Planning your snowshoeing route is one of the most important steps to ensure a safe and enjoyable outing. Thorough preparation helps you avoid potential hazards and makes the experience more rewarding.
Assessing fitness and choosing trails
Be realistic about your fitness level and snowshoeing experience. For beginners, stick to well-marked trails in state or national parks. These routes are often groomed and have fewer surprises. More experienced snowshoers might prefer less-traveled backcountry routes, but keep in mind that snowshoeing is more physically demanding than summer hiking. Even a moderate elevation gain on a map can become challenging when you're breaking trail through deep snow.
Researching trail conditions
Before heading out, gather as much information as possible about your chosen trail. Recent trip reports from other snowshoers or cross-country skiers can provide valuable insights into snow depth, trail conditions, and any obstacles you might encounter. Outdoor forums and social media groups dedicated to local hiking and snowshoeing are often great sources of up-to-date information.
If you plan on bringing your pup with you, make sure the trail is dog-friendly and check out our How to Ski and Snowshoe with Your Dog guide.

Snowshoe trips with your furry friend can be a lot of fun, as long as you’re prepared.
Checking weather forecasts
Winter weather can shift dramatically, especially in mountainous areas. Always check the forecast leading up to your trip and continue monitoring it. Pay attention not only to temperature and precipitation but also to wind chill, which can significantly lower the effective temperature. Adjust your plans or gear accordingly if severe weather is predicted.
Avalanche safety
If you're entering an area prone to avalanches, understanding the current risks is critical. Even if you’re not planning to traverse avalanche-prone terrain, nearby conditions can still impact your safety. Consult regional avalanche information centers for detailed forecasts and condition reports.

Be sure to check weather and trail conditions before heading out on your snowshoe adventure. Carry avalanche gear if you’ll be in avalanche territory.
Daylight considerations
Winter days are short, so plan to start early and aim to finish your route well before dark. Carry a reliable headlamp with fresh batteries, but avoid putting yourself in a position where you’ll need to navigate unfamiliar terrain in the dark.
Trip planning and safety communication
Leave your trip details with a friend or family member who isn’t joining you. Include your planned route, location or trailhead details, estimated return time, and the make and model of your car. Many areas offer hiker registration systems—use them when available for an added layer of safety.
Environmental impact
Snowshoeing has a relatively low environmental impact, but it’s important to practice Leave No Trace principles. Pack out all waste, respect wildlife that may already be stressed by winter conditions, and be mindful of other trail users. Treat the winter environment with care to ensure it remains pristine for future explorers.
Thoughtful preparation and an understanding of your route's challenges and conditions will help you enjoy the experience while minimizing risks.
Snowshoeing techniques
Snowshoeing might feel intuitive, but learning a few fundamental techniques can make your time on the trail far more efficient and enjoyable.
Mastering the basics
Walking in snowshoes is similar to your natural stride, with a few minor adjustments. Keep your stance slightly wider than usual to accommodate the snowshoe width. Lift your feet a bit higher with each step to clear the snow and the longer frame of the snowshoe. Let the tails of the snowshoes glide behind you naturally; there's no need to lift them entirely off the snow with each step.
Tackling uphill terrain
When ascending hills, rely on the toe or instep crampons built into your snowshoes for traction. On steeper slopes, kick the front of your snowshoe into the snow to create a solid step. Many snowshoes feature a heel lift bar that can be flipped up to reduce calf strain and keep your foot in a more comfortable position during climbs. Focus on maintaining a steady rhythm and keeping your weight directly over your feet.

Most snowshoes have crampons and/or heel lift bars to help you on steep ascents.
Descending safely
For downhill sections, shift your weight slightly back onto your heels and keep your knees bent to absorb impact. Take shorter, controlled steps, and use trekking poles to help balance and regulate your speed. If the snow is soft enough, you can use a plunge step or even slide down gently but controlled.
Traversing slopes
When moving across a slope, use the edges of your snowshoes for grip. Kick the uphill edge of your snowshoe into the slope to form a secure platform with each step. Trekking poles are especially helpful for maintaining balance during these traverses.
Breaking trail
Breaking trail in fresh, deep snow is physically demanding. In a group, rotate the lead position regularly to share the workload. The person breaking the trail should step aside periodically to let others take a turn at the front, ensuring no one becomes overly fatigued.
Practice before venturing further
If you’re new to snowshoeing or trying out advanced techniques, practice in a controlled setting before heading into challenging terrain. Many ski areas offer snowshoe-specific trails, which are great places to build confidence and refine your skills.
Mastering these techniques not only helps you navigate terrain more efficiently but also ensures you conserve energy and stay safe on the trail.
Safety and emergency preparedness for snowshoeing
Safety is the cornerstone of any successful snowshoeing trip. Winter landscapes, while beautiful, present unique challenges that demand careful planning and vigilance. Here’s what to know to keep yourself and your group safe.
Understanding cold-weather risks
Cold weather can escalate seemingly minor issues into serious threats. Hypothermia, one of the most significant winter risks, occurs when your body’s core temperature drops too low. Early symptoms include uncontrollable shivering, confusion, and a loss of coordination. If you notice these signs in yourself or a group member, take immediate action: find shelter, replace wet clothing with dry layers, and warm the affected person gradually.
Frostbite is another common risk, particularly for exposed skin or extremities like fingers and toes. Early signs include numbness or a prickling sensation, and the affected area may appear pale or grayish. Never rub frostbitten skin, as this can cause further damage. Instead, use body heat or warm (not hot) water to gently warm the area in a safe, sheltered location.
Dehydration is often overlooked in cold weather, but it’s a critical concern. Winter air is dry, and your body loses moisture rapidly through breathing and exertion. Make hydration a priority by sipping water regularly even if you don’t feel thirsty.
Navigation and wilderness skills
Winter conditions can make familiar terrain unrecognizable. Trails and tracks may be obscured by snow, and landmarks can be harder to spot. While carrying navigation tools is essential, knowing how to use them is just as important. Practice using a map and compass before venturing into the backcountry, and learn how to follow your own tracks back if visibility decreases.
In an emergency, basic survival skills can be lifesaving. Familiarize yourself with building a snow shelter, such as a snow cave or quinzhee, which can provide essential protection from the elements. Learn rescue signaling techniques as well: three whistle blasts, fires, or distinct marks in the snow are internationally recognized distress signals.
Group safety and decision-making
If you’re snowshoeing with others, establish clear communication protocols before hitting the trail. Set clear turn-around points based on time, weather, or group comfort levels. Everyone in the group should feel empowered to voice concerns without hesitation.
Use a buddy system to ensure every group member has someone watching out for them. This increases the likelihood of noticing signs of fatigue, hypothermia, or frostbite before they become severe.

When snowshoeing in a group, be sure to establish communications and safety protocol ahead of time. Everyone should feel comfortable and empowered to voice concerns.
Emergency planning and communication
Always leave a detailed trip plan with a trusted person who isn’t joining you. Include your intended route, expected return time, and vehicle details. Set up check-in times and establish what actions should be taken if you don’t return on schedule.
While cell phones can be helpful, they’re unreliable in cold conditions and remote areas. Battery life plummets in freezing temperatures, and cell coverage is often nonexistent in the backcountry. Carry a satellite communication device for remote trips, and always have a backup communication plan that doesn’t rely on technology.
Prevention is the best plan
Good preparation minimizes the need for emergency interventions. Stay within your skill level, err on the side of caution, and turn back if conditions or weather deteriorate. With the right planning and respect for winter’s challenges, you can fully enjoy the rewards of snowshoeing while staying safe.
About the author / Why you should trust us

Naomi Hudetz is director of analytics and digital innovation and leads business strategy and revenue operations for Treeline Review. She brings decades of private sector experience in project management, budget and pricing projection, and long-term business vision, strategy, and goals.
Naomi left her corporate career to pursue her passion for the outdoors. She received the Triple Crown award for hiking for completing the Appalachian Trail, Pacific Crest, and Continental Divide Trail and has hiked numerous other distance routes including the Great Divide Trail across the Canadian Rockies (twice), Grand Enchantment Trail, Pacific Northwest Trail, the Arizona Trail, (most of) the Idaho Centennial Trail, the first known thru-hike of the Blue Mountains Trail, and the Oregon Desert Trail.
She previously served as Treasurer of the American Long Distance Hiking Association-West and is based in White Salmon, Washington.